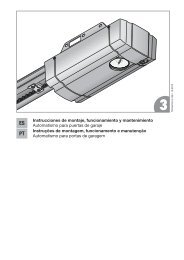
Automatismo para puerta corredera LineaMatic - Hörmann
Automatismo para puerta corredera LineaMatic - Hörmann
Automatismo para puerta corredera LineaMatic - Hörmann

Create successful ePaper yourself
Turn your PDF publications into a flip-book with our unique Google optimized e-Paper software.
ENGLISH<br />
7.2 Programming the hand transmitter buttons on<br />
an integral radio receiver<br />
1. Briefly press print button P once (for channel 1 = impulse<br />
command) or twice (for channel 2 = partial opening<br />
command).<br />
Pressing circuit board button P again will immediately<br />
end radio programming.<br />
Depending on the channel being programmed, the red<br />
LED will flash 1x (for channel 1) or 2x (for channel 2).<br />
During this time, a hand transmitter button can be<br />
programmed for the desired function.<br />
2. Press the hand transmitter button to be programmed<br />
until the red LED on the print flashes rapidly.<br />
The code for this hand transmitter button is now stored in<br />
the integral radio receiver (see Figure 9).<br />
7.3 Deleting all data of an integral radio receiver<br />
ff<br />
Press print button P and keep it pressed.<br />
The red LED flashes slowly, signalling the readiness for<br />
deletion. The flashing rhythm becomes more rapid.<br />
Afterwards, the programmed radio codes of all hand<br />
transmitters are deleted.<br />
7.3.1 Connecting an external radio receiver*<br />
(*Accessory, not included as standard equipment!)<br />
Instead of an integral radio receiver, an external radio receiver<br />
can be used for the impulse or partial opening functions to<br />
control the sliding gate operator. Insert the plug of the receiver<br />
in the corresponding slot (see Figure 4.1). To avoid double<br />
assignments, delete the data of the integral radio receiver<br />
when using an external radio receiver (see Deleting all data of<br />
an integral radio receiver, page 31).<br />
8<br />
Restoring the Factory Setting of the<br />
Sliding Gate Operator<br />
Resetting the control (learned end-of-travel positions,<br />
forces):<br />
1. Set DIL switch 2 to ON.<br />
2. Immediately press print button P briefly.<br />
3. When the red LED flashes rapidly, DIL switch 2 must be<br />
quickly set to OFF.<br />
The control system has now been reset to the factory<br />
setting.<br />
9<br />
Operation<br />
WARNING<br />
Danger of injury during operation<br />
Persons or objects may be trapped while the gate is<br />
closing.<br />
ff Only operate the sliding gate operator if you can see<br />
the gate's area of travel!<br />
ff Before driving in or out of the gateway, always check<br />
that the gate has fully opened. Never drive or walk<br />
through gateways unless the entrance gate has<br />
reached the OPEN end-of-travel position.<br />
Danger of crushing and shearing<br />
Fingers or limbs may be crushed and severed if caught in<br />
the toothed track or between the gate and closing edge<br />
while the gate is in motion.<br />
ff Whenever the gate is moving, never touch the toothed<br />
track, toothed wheel, and the main or secondary<br />
closing edges.<br />
Before operation:<br />
ff All persons using the gate system<br />
must be shown how to operate it<br />
properly and safely.<br />
ff Demonstrate and test the<br />
mechanical release as well as the<br />
safety return. To do this, halt the<br />
closing gate by grasping it with<br />
both hands.<br />
The gate system must initiate the<br />
safety return.<br />
The control is set for normal operation.<br />
ff<br />
Press print button T, the external button or activate<br />
impulse 1.<br />
The gate moves in impulse sequence mode (OPEN-<br />
STOP-CLOSE-STOP).<br />
On activating impulse 2, the gate opens partially (see<br />
Figure 4.1/4.2/9b).<br />
9.1 Behaviour during a power failure<br />
To be able to open or close the sliding gate during a power<br />
failure, it must be disengaged from the operator.<br />
Caution!<br />
Damage due to moisture<br />
ff Protect the control from moisture when you open the<br />
operator housing<br />
1. Open the housing cover as in Figure 1.3.<br />
2. Release the operator by turning the locking mechanism.<br />
When releasing the operator, the motor and toothed<br />
wheel may have to be pressed downwards to lower them<br />
in the housing (see Figure 11.1).<br />
The gate can then be opened and closed by hand.<br />
TR10A059-C RE / 10.2008 31