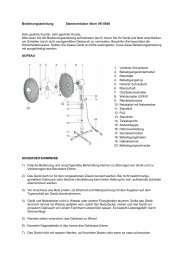
Erfolgreiche ePaper selbst erstellen
Machen Sie aus Ihren PDF Publikationen ein blätterbares Flipbook mit unserer einzigartigen Google optimierten e-Paper Software.
Stage 9: final work, balancing, parts 9.1 - 9.6<br />
• Sand the fixed conning tower control panels 9.1 to the profile shown in the cross-section, trim the<br />
inboard ends to match the shape of the conning tower, and glue them in place. Check that the two<br />
parts 9.1 are horizontal and in line.<br />
• Open up the boat.<br />
• Drill a 1 mm hole for the steel whip aerial 9.2 in the rear buoyancy <strong>hu</strong>ll cap 1.8, as shown on the plan.<br />
Drill two holes for the receiver aerial in the insert plate.<br />
• Cut down the flexible receiver aerial by 500 mm.<br />
• Push the steel whip aerial 9.2 through the hole in the buoyancy <strong>hu</strong>ll cap.<br />
• Make up the connection between the flexible aerial and the whip aerial, either by soldering the ends<br />
together, or by fitting a plug and socket.<br />
• Glue the steel whip aerial in the hole in the buoyancy <strong>hu</strong>ll cap, using instant glue, and apply a fillet of<br />
Stabilit Express on the inside.<br />
• Sand the top plate 9.3 to the shape shown in the drawing, trim it to fit on the <strong>hu</strong>ll top, and glue it in<br />
place.<br />
• Drill a 5.3 mm hole for the valve 9.4. Press the valve into the hole and secure it by applying instant<br />
glue on the outside.<br />
• Sand all parts smooth, using very fine glasspaper, and your model is ready for painting.<br />
• Glue one lead sheet 9.5 exactly central in the <strong>hu</strong>ll nose, in the position shown on the plan, using<br />
Stabilit Express. Glue a further six sheets on top of the first, with the edges flush.<br />
• Glue one lead sheet 9.6 in the bottom rear section, as shown on the plan. Glue a further 5 sheets on<br />
top of the first.<br />
• Assemble the model completely.<br />
• Blow into the valve 9.4 to check that the buoyancy <strong>hu</strong>ll is airtight. No air should escape to the outside<br />
when you blow.<br />
• Place the submarine in a filled bathtub to allow you to fine trim the model’s balance. It should float<br />
exactly horizontal, with the top surface of the <strong>hu</strong>ll level with the surface of the water.<br />
• To achieve this basic attitude, you will need to add about two more lead sheets at the front, and<br />
about one and a half more sheets at the rear. First place the sheets on top of the <strong>hu</strong>ll, and establish<br />
the size and number required. Glue them on top of the other lead sheets, and check that the model<br />
has no tendency to list.<br />
• Before you run the model for the first time, the propeller shaft must be lubricated. Fit the grease gun<br />
over the lubricating nipple, and fill the stern tube completely with grease.<br />
54