Sie wollen auch ein ePaper? Erhöhen Sie die Reichweite Ihrer Titel.
YUMPU macht aus Druck-PDFs automatisch weboptimierte ePaper, die Google liebt.
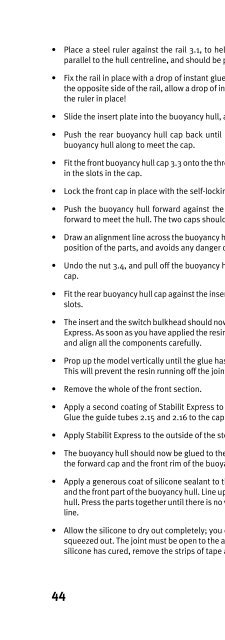
• Place a steel ruler against the rail 3.1, to help you to align the rail perfectly straight. It must run<br />
parallel to the <strong>hu</strong>ll centreline, and should be perfectly straight.<br />
• Fix the rail in place with a drop of instant glue at front and rear. With the steel ruler resting against<br />
the opposite side of the rail, allow a drop of instant glue to run along the joint. Take care not to glue<br />
the ruler in place!<br />
• Slide the insert plate into the buoyancy <strong>hu</strong>ll, and check that it runs smoothly on the rail 3.1.<br />
• Push the rear buoyancy <strong>hu</strong>ll cap back until it rests against the lubricating nipple, and slide the<br />
buoyancy <strong>hu</strong>ll along to meet the cap.<br />
• Fit the front buoyancy <strong>hu</strong>ll cap 3.3 onto the threaded rod 2.2, and check that the insert plate engages<br />
in the slots in the cap.<br />
• Lock the front cap in place with the self-locking nut 3.4. Do not tighten the nut firmly.<br />
• Push the buoyancy <strong>hu</strong>ll forward against the front cap as far as it will go, and slide the rear cap<br />
forward to meet the <strong>hu</strong>ll. The two caps should seat snugly in the buoyancy <strong>hu</strong>ll, with no gaps.<br />
• Draw an alignment line across the buoyancy <strong>hu</strong>ll and the forward <strong>hu</strong>ll cap. This determines the final<br />
position of the parts, and avoids any danger of gluing them together in the wrong position.<br />
• Undo the nut 3.4, and pull off the buoyancy <strong>hu</strong>ll forward, together with the forward buoyancy <strong>hu</strong>ll<br />
cap.<br />
• Fit the rear buoyancy <strong>hu</strong>ll cap against the insert plate again, checking that it engages squarely in the<br />
slots.<br />
• The insert and the switch bulkhead should now be glued to the rear buoyancy <strong>hu</strong>ll cap, using Stabilit<br />
Express. As soon as you have applied the resin, fit the buoyancy <strong>hu</strong>ll and forward buoyancy <strong>hu</strong>ll cap,<br />
and align all the components carefully.<br />
• Prop up the model vertically until the glue has set hard, e.g. with the stern tube in an empty bottle.<br />
This will prevent the resin running off the joint.<br />
• Remove the whole of the front section.<br />
• Apply a second coating of Stabilit Express to the joint at the rear buoyancy <strong>hu</strong>ll cap on the inside.<br />
Glue the guide tubes 2.15 and 2.16 to the cap at the same time.<br />
• Apply Stabilit Express to the outside of the stern tube at the buoyancy <strong>hu</strong>ll cap.<br />
• The buoyancy <strong>hu</strong>ll should now be glued to the front cap. Apply transparent adhesive tape all round<br />
the forward cap and the front rim of the buoyancy <strong>hu</strong>ll.<br />
• Apply a generous coat of silicone sealant to the inside flange of the forward buoyancy <strong>hu</strong>ll cap 3.3<br />
and the front part of the buoyancy <strong>hu</strong>ll. Line up the alignment marks, and fit the cap on the buoyancy<br />
<strong>hu</strong>ll. Press the parts together until there is no visible gap. Check that the alignment marks are still in<br />
line.<br />
• Allow the silicone to dry out completely; you can check this by feeling the excess material which is<br />
squeezed out. The joint must be open to the air on both sides while the sealant is setting. When the<br />
silicone has cured, remove the strips of tape and the excess sealant.<br />
44


