Sie wollen auch ein ePaper? Erhöhen Sie die Reichweite Ihrer Titel.
YUMPU macht aus Druck-PDFs automatisch weboptimierte ePaper, die Google liebt.
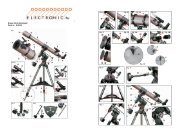
9. Applying the transfers<br />
40<br />
The kit box illustration gives a good idea of where to apply the transfers.<br />
• Applying the transfersFill a medium-sized plastic bowl with luke-warm water (around 20 degrees C),<br />
and add a few generous squirts of liquid detergent.<br />
• Moisten a sponge cloth in the solution, and wet the area of the model which is to be decorated.<br />
• Peel off one of the transfers, moisten it in the bowl, place it on the model and move it into position.<br />
• When you are satisfied, press it down with a cloth.<br />
• Allow the water under the transfer to dry out, then press down once more with a soft dry cloth.<br />
<br />
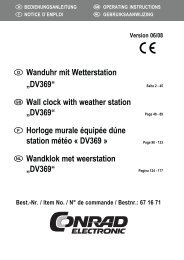
10. Radio control equipment<br />
2-channel radio control system is sufficient to control the model. If you wish to control the depth vanes<br />
you will need a 4-channel set.<br />
The receiver system is powered from the main drive battery, so you will need a motor controller rated at<br />
a minimum of 20 A continuous current, with integral receiver power supply.<br />
We recommend that you use the RC system components shown on the plan. If you intend using a radio<br />
other than the recommended Robbe system, you can still follow the arrangement shown, but you will<br />
need to allow for minor differences in component size.<br />
Set the servos to neutral using the radio control system before you start building (sticks and trim levers<br />
central).