FS-1030D Service Manual - kyocera
FS-1030D Service Manual - kyocera
FS-1030D Service Manual - kyocera

Create successful ePaper yourself
Turn your PDF publications into a flip-book with our unique Google optimized e-Paper software.
2G6<br />
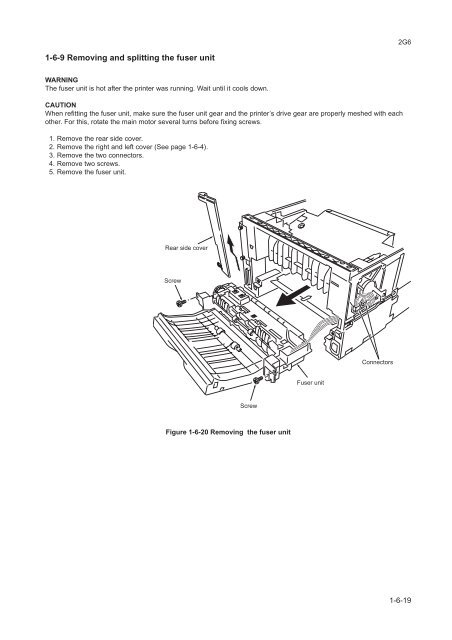
1-6-9 Removing and splitting the fuser unit<br />
WARNING<br />
The fuser unit is hot after the printer was running. Wait until it cools down.<br />
CAUTION<br />
When refitting the fuser unit, make sure the fuser unit gear and the printer’s drive gear are properly meshed with each<br />
other. For this, rotate the main motor several turns before fixing screws.<br />
1. Remove the rear side cover.<br />
2. Remove the right and left cover (See page 1-6-4).<br />
3. Remove the two connectors.<br />
4. Remove two screws.<br />
5. Remove the fuser unit.<br />
Rear side cover<br />
Screw<br />
Connectors<br />
Fuser unit<br />
Screw<br />
Figure 1-6-20 Removing the fuser unit<br />
1-6-19