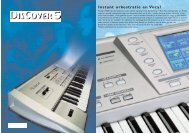
BK-7m_OM.pdf - Roland
BK-7m_OM.pdf - Roland
BK-7m_OM.pdf - Roland

You also want an ePaper? Increase the reach of your titles
YUMPU automatically turns print PDFs into web optimized ePapers that Google loves.
Backing Module <strong>BK</strong>-<strong>7m</strong> r<br />
Details about the ‘Wizard Connection’ categories<br />
allowing you to control which notes you play on your<br />
guitar should be recognized by the <strong>BK</strong>-<strong>7m</strong>’s Arranger<br />
(see p. 65).<br />
The “Wizard Connection” function sets the <strong>BK</strong>-<strong>7m</strong>’s<br />
chord recognition to “Guitarist” (irrespective of<br />
whether or not the [SPLIT] button lights) and activates<br />
the “Split” and “Arranger Type” filters of the<br />
“Performance Hold” function to ensure that those<br />
settings don’t change when you recall another Performance<br />
memory or One Touch setting.<br />
NOTE<br />
<strong>Roland</strong> recommends leaving the [SPLIT] button off while<br />
you are using this setting.<br />
•“Wizard Settings will be saved” (see step (7) on<br />
page 22).<br />
The “Wizard Connection” function sets the <strong>BK</strong>-<strong>7m</strong>’s<br />
chord recognition to “Intelligent” (irrespective of<br />
whether or not the [SPLIT] button lights) and activates<br />
the “Split” and “Arranger Type” filters of the<br />
“Performance Hold” function to ensure that those<br />
settings don’t change when you recall another Performance<br />
memory or One Touch setting.<br />
NOTE<br />
<strong>Roland</strong> recommends leaving the [SPLIT] button off while<br />
you are using the “MULTI CHANNEL” setting.<br />
‘DIGITAL ORGAN’ category<br />
Select “CHURCH ORGAN1” if your organ transmits on<br />
MIDI channels 12, 13 and 14.<br />
•The only step will be “Wizard Settings will be<br />
saved” (see step (7) on page 22).<br />
Select “CHURCH ORGAN2” if your organ transmits on<br />
MIDI channels 1, 2 and 3.<br />
•The only step will be “Wizard Settings will be<br />
saved” (see step (7) on page 22).<br />
The notes played on Manual II (Swell) and Manual I<br />
(Great) as well as the bass pedal board control the<br />
<strong>BK</strong>-<strong>7m</strong>’s real-time parts UP1, UP2, LWR and MBS. The<br />
chords played on Manual I (Great) are also used by<br />
the Arranger’s NTA section (for chord recognition).<br />
The “Wizard Connection” function sets the <strong>BK</strong>-<strong>7m</strong>’s<br />
chord recognition to “Intelligent” (irrespective of<br />
whether or not the [SPLIT] button lights) and activates<br />
the “Split” and “Arranger Type” filters of the<br />
“Performance Hold” function to ensure that those<br />
settings don’t change when you recall another Performance<br />
memory or One Touch setting.<br />
NOTE<br />
<strong>Roland</strong> recommends leaving the [SPLIT] button off while<br />
you are using one of these settings.<br />
‘C<strong>OM</strong>PUTER/SEQUENCER’ category<br />
This “Wizard Connection” option configures the <strong>BK</strong>-<strong>7m</strong><br />
for use as a multitimbral sound module that is controlled<br />
by a software sequencer running on your computer.<br />
•The only step will be “Wizard Settings will be<br />
saved” (see step (7) on page 22).<br />
NOTE<br />
This option disables MIDI data reception by the <strong>BK</strong>-<strong>7m</strong>’s<br />
Arranger and real-time parts, because all 16 MIDI channels are<br />
already taken.<br />
Select “ELECTRONIC ORGAN” if your organ transmits<br />
on other MIDI channels than the ones selected for<br />
“CHURCH ORGAN1” and “CHURCH ORGAN2”. In this<br />
mode, the <strong>BK</strong>-<strong>7m</strong>’s wizard detects the MIDI channel<br />
numbers to be assigned to UP1, UP2, LWR and MBS. The<br />
chords you play on the lower manual (LWR) are also<br />
used by the <strong>BK</strong>-<strong>7m</strong>’s Arranger.<br />
Here, there are four steps:<br />
•“Play a note on Upper section” ‰ Press any key on<br />
the upper manual to specify the MIDI channel for the<br />
UP1 and UP2 parts.<br />
•“Play a note on Lower section” ‰ Press any key on<br />
the lower manual to specify the MIDI channel for the<br />
LWR part.<br />
•“Play a note on Pedal section” ‰ Press any pedalboard<br />
key to specify the MIDI channel for the MBS<br />
part.<br />
25