e - Spotlight Promotions
e - Spotlight Promotions
e - Spotlight Promotions

Create successful ePaper yourself
Turn your PDF publications into a flip-book with our unique Google optimized e-Paper software.
• make it<br />
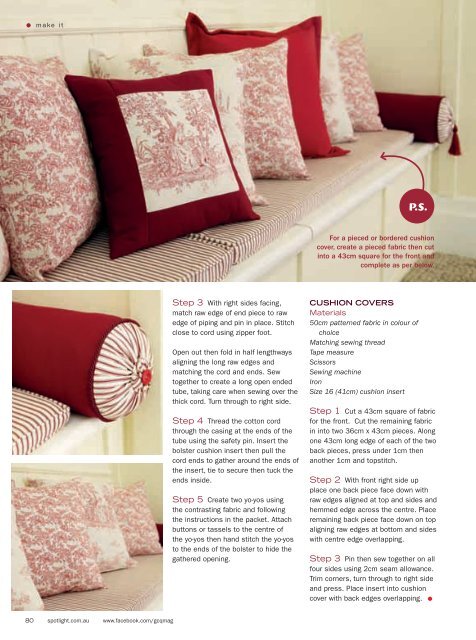
For a pieced or bordered cushion<br />
cover, create a pieced fabric then cut<br />
into a 43cm square for the front and<br />
complete as per below.<br />
Step 3 With right sides facing,<br />
match raw edge of end piece to raw<br />
edge of piping and pin in place. Stitch<br />
close to cord using zipper foot.<br />
Open out then fold in half lengthways<br />
aligning the long raw edges and<br />
matching the cord and ends. Sew<br />
together to create a long open ended<br />
tube, taking care when sewing over the<br />
thick cord. Turn through to right side.<br />
Step 4 Thread the cotton cord<br />
through the casing at the ends of the<br />
tube using the safety pin. Insert the<br />
bolster cushion insert then pull the<br />
cord ends to gather around the ends of<br />
the insert, tie to secure then tuck the<br />
ends inside.<br />
Step 5 Create two yo-yos using<br />
the contrasting fabric and following<br />
the instructions in the packet. Attach<br />
buttons or tassels to the centre of<br />
the yo-yos then hand stitch the yo-yos<br />
to the ends of the bolster to hide the<br />
gathered opening.<br />
CUSHION COVERS<br />
Materials<br />
50cm patterned fabric in colour of<br />
choice<br />
Matching sewing thread<br />
Tape measure<br />
Scissors<br />
Sewing machine<br />
Iron<br />
Size 16 (41cm) cushion insert<br />
Step 1 Cut a 43cm square of fabric<br />
for the front. Cut the remaining fabric<br />
in into two 36cm x 43cm pieces. Along<br />
one 43cm long edge of each of the two<br />
back pieces, press under 1cm then<br />
another 1cm and topstitch.<br />
Step 2 With front right side up<br />
place one back piece face down with<br />
raw edges aligned at top and sides and<br />
hemmed edge across the centre. Place<br />
remaining back piece face down on top<br />
aligning raw edges at bottom and sides<br />
with centre edge overlapping.<br />
Step 3 Pin then sew together on all<br />
four sides using 2cm seam allowance.<br />
Trim corners, turn through to right side<br />
and press. Place insert into cushion<br />
cover with back edges overlapping. •<br />
80 spotlight.com.au www.facebook.com/gcqmag