Model SR715 Model SR720 LCR Meters
Model SR715 Model SR720 LCR Meters
Model SR715 Model SR720 LCR Meters
- No tags were found...

You also want an ePaper? Increase the reach of your titles
YUMPU automatically turns print PDFs into web optimized ePapers that Google loves.
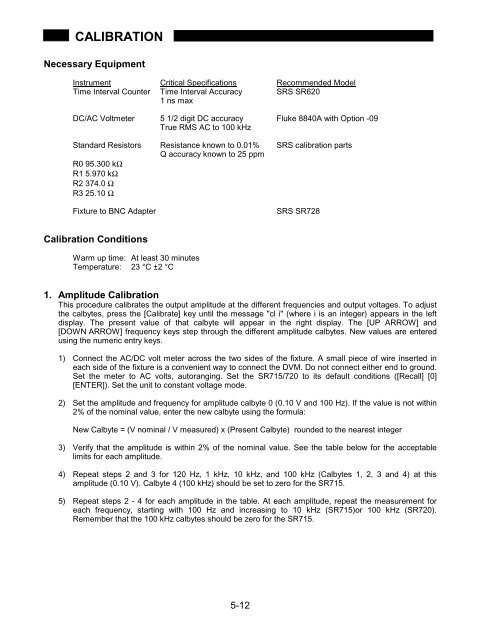
CALIBRATIONNecessary EquipmentInstrument Critical Specifications Recommended <strong>Model</strong>Time Interval Counter Time Interval Accuracy SRS SR6201 ns maxDC/AC Voltmeter 5 1/2 digit DC accuracy Fluke 8840A with Option -09True RMS AC to 100 kHzStandard Resistors Resistance known to 0.01% SRS calibration partsQ accuracy known to 25 ppmR0 95.300 kΩR1 5.970 kΩR2 374.0 ΩR3 25.10 ΩFixture to BNC AdapterSRS SR728Calibration ConditionsWarm up time: At least 30 minutesTemperature: 23 °C ±2 °C1. Amplitude CalibrationThis procedure calibrates the output amplitude at the different frequencies and output voltages. To adjustthe calbytes, press the [Calibrate] key until the message "cl i" (where i is an integer) appears in the leftdisplay. The present value of that calbyte will appear in the right display. The [UP ARROW] and[DOWN ARROW] frequency keys step through the different amplitude calbytes. New values are enteredusing the numeric entry keys.1) Connect the AC/DC volt meter across the two sides of the fixture. A small piece of wire inserted ineach side of the fixture is a convenient way to connect the DVM. Do not connect either end to ground.Set the meter to AC volts, autoranging. Set the <strong>SR715</strong>/720 to its default conditions ([Recall] [0][ENTER]). Set the unit to constant voltage mode.2) Set the amplitude and frequency for amplitude calbyte 0 (0.10 V and 100 Hz). If the value is not within2% of the nominal value, enter the new calbyte using the formula:New Calbyte = (V nominal / V measured) x (Present Calbyte) rounded to the nearest integer3) Verify that the amplitude is within 2% of the nominal value. See the table below for the acceptablelimits for each amplitude.4) Repeat steps 2 and 3 for 120 Hz, 1 kHz, 10 kHz, and 100 kHz (Calbytes 1, 2, 3 and 4) at thisamplitude (0.10 V). Calbyte 4 (100 kHz) should be set to zero for the <strong>SR715</strong>.5) Repeat steps 2 - 4 for each amplitude in the table. At each amplitude, repeat the measurement foreach frequency, starting with 100 Hz and increasing to 10 kHz (<strong>SR715</strong>)or 100 kHz (<strong>SR720</strong>).Remember that the 100 kHz calbytes should be zero for the <strong>SR715</strong>.5-12