The Knowledge - Velocette Owners Club
The Knowledge - Velocette Owners Club
The Knowledge - Velocette Owners Club

Create successful ePaper yourself
Turn your PDF publications into a flip-book with our unique Google optimized e-Paper software.
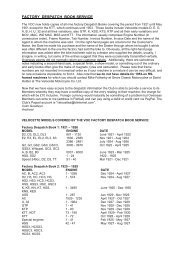
in reverse. What else could you spend that £360 on for the bike?<br />
#2929 You could try "floating" the brake shoes.<br />
#2934 Don't forget that pre-unit Triumph rear shoes fit the Velo rear brake perfectly, and are already<br />
"floating". <strong>The</strong> cheap, bonded import ones on the back of my Venom worked very well with no<br />
bedding-in, and lasted 25k miles. <strong>The</strong> drum and sprocket were both done by then, but the shoes were<br />
not (quite) worn out.<br />
L #3042 Just got off the phone to the very helpful folks at the Avon tire company office in<br />
Washington state as I was unable to find a new replacement tire for my 1970 Velo Thruxton. Both front<br />
and rear rims are 19" WM2. This presents no problems in the front as a 90/90 AM 20 Roadrunner is<br />
available, however nothing for the back, without changing to a WM3 19" or WM3 18" rim. Don't really<br />
want to switch rims on this bike, although I certainly will to keep riding it. Just wondering if anyone else<br />
had come up against this problem and how they resolved it?<br />
#3043 Some time ago the famous Geoff Dodkin recommended the following tires for my Thruxton, to<br />
which I stuck with best results till today: Front : Avon 90/90 H 19 Roadrunner F2 (a ribbed racing<br />
compound) Rear : Avon 4.10 H 19 Roadrunner Universal (use only road compound !) Although the front<br />
is a soft racing compound it lasts on the road for appr. 6000 miles. As much as the rear, if you choose<br />
road rubber. Once I tried even the rear in racing compound, but this got me only 1000 miles out of it.<br />
You will be amazed how handling will be improved with the above tire combination.<br />
#3044 I see two possibilities and while I was on the phone ordering a set for a '49 Ajay, I checked stock<br />
on both possibilities. Both possibilities in stock!! Tires were ordered from my fav tyre supplier, South<br />
West Moto Tires, 1-877-805-8473. With new Metzler tubes, freight free, cost was $186. Ordered AM 20<br />
front "Road Runner" 325-19 TL, fits 2.15 - 3.00 rims AM 18 rear "SuperVenom" 100/90-19 TL, fits 2.15 -<br />
3.00 rims currently used on my '66 Thruxton running Dunlop WM2 alloy rims, and in stock Speedmaster<br />
Rib, 3.50 - 19 TT fits 1.85 - 2.50 rims SM MK II, 400-19 TT, fits 2.15 - 3.00 rims.<br />
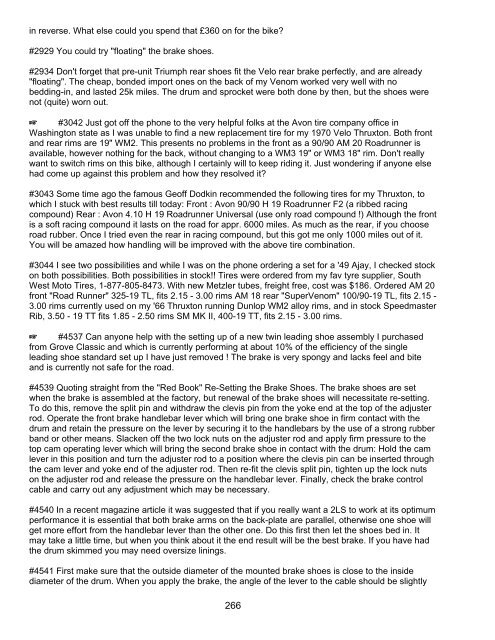
L #4537 Can anyone help with the setting up of a new twin leading shoe assembly I purchased<br />
from Grove Classic and which is currently performing at about 10% of the efficiency of the single<br />
leading shoe standard set up I have just removed ! <strong>The</strong> brake is very spongy and lacks feel and bite<br />
and is currently not safe for the road.<br />
#4539 Quoting straight from the "Red Book" Re-Setting the Brake Shoes. <strong>The</strong> brake shoes are set<br />
when the brake is assembled at the factory, but renewal of the brake shoes will necessitate re-setting.<br />
To do this, remove the split pin and withdraw the clevis pin from the yoke end at the top of the adjuster<br />
rod. Operate the front brake handlebar lever which will bring one brake shoe in firm contact with the<br />
drum and retain the pressure on the lever by securing it to the handlebars by the use of a strong rubber<br />
band or other means. Slacken off the two lock nuts on the adjuster rod and apply firm pressure to the<br />
top cam operating lever which will bring the second brake shoe in contact with the drum: Hold the cam<br />
lever in this position and turn the adjuster rod to a position where the clevis pin can be inserted through<br />
the cam lever and yoke end of the adjuster rod. <strong>The</strong>n re-fit the clevis split pin, tighten up the lock nuts<br />
on the adjuster rod and release the pressure on the handlebar lever. Finally, check the brake control<br />
cable and carry out any adjustment which may be necessary.<br />
#4540 In a recent magazine article it was suggested that if you really want a 2LS to work at its optimum<br />
performance it is essential that both brake arms on the back-plate are parallel, otherwise one shoe will<br />
get more effort from the handlebar lever than the other one. Do this first then let the shoes bed in. It<br />
may take a little time, but when you think about it the end result will be the best brake. If you have had<br />
the drum skimmed you may need oversize linings.<br />
#4541 First make sure that the outside diameter of the mounted brake shoes is close to the inside<br />
diameter of the drum. When you apply the brake, the angle of the lever to the cable should be slightly<br />
266