
You also want an ePaper? Increase the reach of your titles
YUMPU automatically turns print PDFs into web optimized ePapers that Google loves.
Programming signals<br />
from other remote<br />
controls<br />
(VSX-D811S only)<br />
If the preset code for your component<br />
is not available, or the<br />
available preset codes do not<br />
operate correctly, you can program<br />
signals from the remote control of<br />
another component. This can also<br />
be used to program additional<br />
operations (buttons not covered in<br />
the presets) after assigning a<br />
preset code.<br />
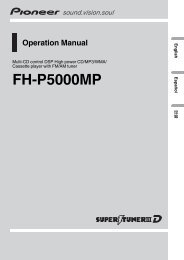
1 Press REMOTE SETUP and<br />
hold for three seconds.<br />
The LED lights steadily for two<br />
seconds.<br />
2 Press the MULTI CONTROL<br />
button for the component you<br />
want to control.<br />
3 Prepare the remote to learn<br />
the remote control signal from<br />
the component.<br />
Press and hold the RECEIVER<br />
button for two seconds.<br />
The LED lights steadily to indicate<br />
the remote is ready accept a<br />
signal.<br />
To exit or cancel press and hold<br />
the REMOTE SETUP key for<br />
three seconds.<br />
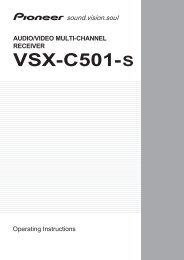
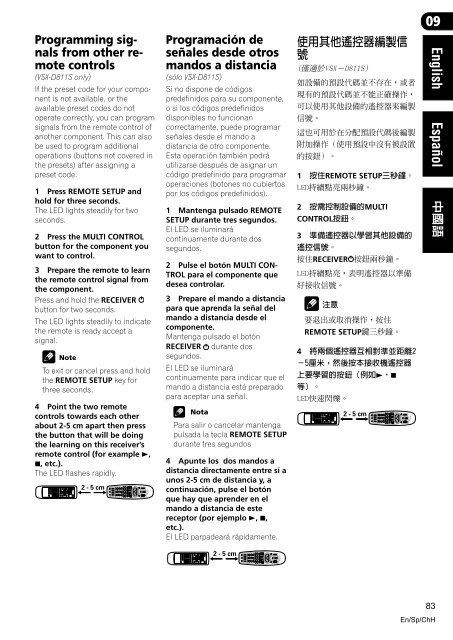
4 Point the two remote<br />
controls towards each other<br />
about 2-5 cm apart then press<br />
the button that will be doing<br />
the learning on this receiver’s<br />
remote control (for example 3,<br />
7, etc.).<br />
The LED flashes rapidly.<br />
2 - 5 cm<br />
Programación de<br />
señales desde otros<br />
mandos a distancia<br />
(sólo VSX-D811S)<br />
Si no dispone de códigos<br />
predefinidos para su componente,<br />
o si los códigos predefinidos<br />
disponibles no funcionan<br />
correctamente, puede programar<br />
señales desde el mando a<br />
distancia de otro componente.<br />
Esta operación también podrá<br />
utilizarse después de asignar un<br />
código predefinido para programar<br />
operaciones (botones no cubiertos<br />
por los códigos predefinidos).<br />
1 Mantenga pulsado REMOTE<br />
SETUP durante tres segundos.<br />
El LED se iluminará<br />
continuamente durante dos<br />
segundos.<br />
2 Pulse el botón MULTI CON-<br />
TROL para el componente que<br />
desea controlar.<br />
3 Prepare el mando a distancia<br />
para que aprenda la señal del<br />
mando a distancia desde el<br />
componente.<br />
Mantenga pulsado el botón<br />
RECEIVER durante dos<br />
segundos.<br />
El LED se iluminará<br />
continuamente para indicar que el<br />
mando a distancia está preparado<br />
para aceptar una señal.<br />
Nota<br />
Para salir o cancelar mantenga<br />
pulsada la tecla REMOTE SETUP<br />
durante tres segundos<br />
4 Apunte los dos mandos a<br />
distancia directamente entre sí a<br />
unos 2-5 cm de distancia y, a<br />
continuación, pulse el botón<br />
que hay que aprender en el<br />
mando a distancia de este<br />
receptor (por ejemplo 3, 7,<br />
etc.).<br />
El LED parpadeará rápidamente.<br />
<br />
<br />
<br />
<br />
<br />
<br />
<br />
<br />
<br />
<br />
1 REMOTE SETUP<br />
<br />
2 MULTI<br />
CONTROL<br />
3 <br />
<br />
RECEIVER <br />
<br />
<br />
<br />
REMOTE SETUP<br />
4 <br />
<br />
37<br />
<br />
<br />
2 - 5 cm<br />
09<br />
English Español<br />
2 - 5 cm<br />
83<br />
En/Sp/ChH