

XE-A102
XE-A102
XE-A102

Create successful ePaper yourself
Turn your PDF publications into a flip-book with our unique Google optimized e-Paper software.
Preparing the Cash Register<br />
On your register, a printer is mounted, and you can print receipts or journals. For the printer, you<br />
must install the paper roll provided with the register, even when you program the register for not<br />
printing receipt.<br />
6<br />
Step 3 Install Batteries<br />
Three new R6 or LR6 batteries (“AA”size) must be installed in the cash register to prevent the data<br />
and user-programmed settings from being erased from the memory, when the AC cord is<br />
accidentally disconnected or in case of power failure. Once installed, the batteries will last<br />
approximately one year before needing replacement. At this time, the “ ” symbol will appear on<br />
the display to indicate that the batteries are low and that you must replace them within two days.<br />
Install three new R6 or LR6 batteries (“AA”size) according to the procedure shown below with the<br />
AC cord connected and set the mode switch to the REG position:<br />
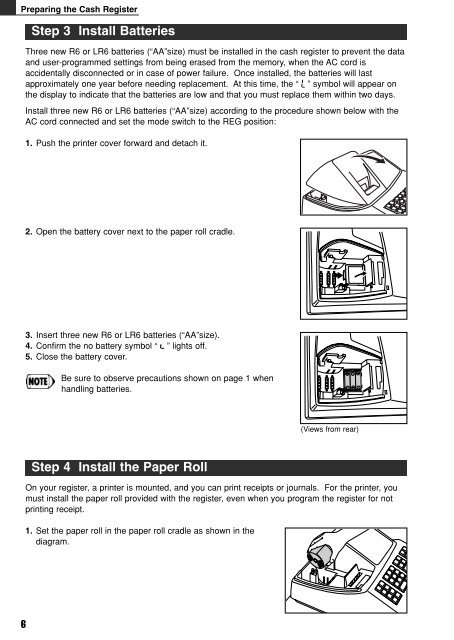
1. Push the printer cover forward and detach it.<br />
2. Open the battery cover next to the paper roll cradle.<br />
3. Insert three new R6 or LR6 batteries (“AA”size).<br />
4. Confirm the no battery symbol “ ” lights off.<br />
5. Close the battery cover.<br />
Be sure to observe precautions shown on page 1 when<br />
handling batteries.<br />
Step 4 Install the Paper Roll<br />
1. Set the paper roll in the paper roll cradle as shown in the<br />
diagram.<br />
(Views from rear)