User Manual - Ajckids.com
User Manual - Ajckids.com
User Manual - Ajckids.com
Create successful ePaper yourself
Turn your PDF publications into a flip-book with our unique Google optimized e-Paper software.
2<br />
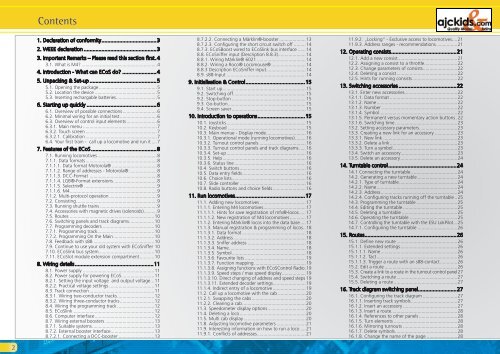
Contents<br />
1. Declaration of conformity .....................................3<br />
2. WEEE declaration .................................................3<br />
3. Important Remarks – Please read this section first . 4<br />
3.1. What is M4? .........................................................4<br />
4. Introduction - What can ECoS do? .......................4<br />
5. Unpacking & Set-up .............................................5<br />
5.1. Opening the package ............................................5<br />
5.2. Location the device ...............................................5<br />
5.3. Inserting rechargable batteries ...............................5<br />
6. Starting up quickly ...............................................6<br />
6.1. Overview of possible connections ..........................6<br />
6.2. Minimal wiring for an initial test ............................6<br />
6.3. Overview of control input elements .......................6<br />
6.3.1. Main menu ........................................................7<br />
6.3.2. Touch screen ......................................................7<br />
6.3.2.1. Calibration ......................................................7<br />
6.4. Your first train - call up a lo<strong>com</strong>otive and run it ....7<br />
7. Features of the ECoS ............................................8<br />
7.1. Running lo<strong>com</strong>otives .............................................8<br />
7.1.1. Data formats ......................................................8<br />
7.1.1.1. Data format Motorola® ..................................8<br />
7.1.1.2. Range of addresses - Motorola® .....................8<br />
7.1.1.3. DCC-Format ...................................................8<br />
7.1.1.4. LGB®-Format extensions .................................8<br />
7.1.1.5. Selectrix® .......................................................9<br />
7.1.1.6. M4 ..................................................................9<br />
7.1.2. Multi-protocol operation ....................................9<br />
7.2. Consisting .............................................................9<br />
7.3. Running shuttle trains ...........................................9<br />
7.4. Accessories with magnetic drives (solenoids)..........9<br />
7.5. Routes ................................................................10<br />
7.6. Switching panels and track diagrams ...................10<br />
7.7. Programming decoders .......................................10<br />
7.7.1. Programming track ...........................................10<br />
7.7.2. Programming On the Main ...............................10<br />
7.8. Feedback with s88 ..............................................10<br />
7.9. Continue to use your old system with ECoSniffer 10<br />
7.10. ECoSlink bus system ..........................................10<br />
7.11. ECoSlot module extension <strong>com</strong>partment ...........10<br />
8. Wiring details .....................................................11<br />
8.1. Power supply ......................................................11<br />
8.2. Power supply for powering ECoS.........................11<br />
8.2.1. Setting the input voltage and output voltage...11<br />
8.2.2. Practical voltage settings ..................................11<br />
8.3. Track connection .................................................11<br />
8.3.1. Wiring two-conductor tracks ............................12<br />
8.3.2. Wiring three-conductor tracks ..........................12<br />
8.4. Wiring the programming track ............................12<br />
8.5. ECoSlink .............................................................12<br />
8.6. Computer interface .............................................12<br />
8.7. Wiring external boosters .....................................13<br />
8.7.1. Suitable systems ...............................................13<br />
8.7.2. External booster interface .................................13<br />
8.7.2.1. Connecting a DCC-booster ...........................13<br />
8.7.2.2. Connecting a Märklin®-booster ....................13<br />
8.7.2.3. Configuring the short circuit switch off .........14<br />
8.7.3. ECoSBoost wired to ECoSlink bus interface ......14<br />
8.8. ECoSniffer input (Description 8.8.3) .....................14<br />
8.8.1. Wiring Märklin® 6021 .....................................14<br />
8.8.2. Wiring a Roco® Lo<strong>com</strong>ouse® ..........................14<br />
8.8.3 Description ECoSniffer input ..............................14<br />
8.9. s88-Input ............................................................14<br />
9. Initialisation & Control ........................................15<br />
9.1. Start up ...............................................................15<br />
9.2. Switching off .......................................................15<br />
9.2. Stop-button ........................................................15<br />
9.3. Go-button ...........................................................15<br />
9.4. Screen saver ........................................................15<br />
10. Introduction to operations ................................15<br />
10.1. Joysticks ............................................................15<br />
10.2. Keyboad ...........................................................15<br />
10.3. Main menue - Display mode ..............................16<br />
10.3.1. Operational mode (running lo<strong>com</strong>otives) ........16<br />
10.3.2. Turnout control panels ...................................16<br />
10.3.3. Turnout control panels and track diagrams .....16<br />
10.3.4. Set-up ............................................................16<br />
10.3.5. Help ...............................................................16<br />
10.3.6. Status line ......................................................16<br />
10.4. Switch buttons ..................................................16<br />
10.5. Data entry fields ................................................16<br />
10.6. Choice lists ........................................................16<br />
10.7. Slide controller ..................................................16<br />
10.8. Radio buttons and choice fields .........................16<br />
11. Run lo<strong>com</strong>otives ...............................................17<br />
11.1. Adding new lo<strong>com</strong>otives ...................................17<br />
11.1.1. Entering M4 lo<strong>com</strong>otives ................................17<br />
11.1.1.1. Hints for save registration of mfx®-locos .....17<br />
11.1.1.2. New registration of M4 lo<strong>com</strong>otives ............17<br />
11.1.2. Entering Märklin® locos into the data base ....17<br />
11.1.3. <strong>Manual</strong> registration & programming of locos ..18<br />
11.1.3.1. Data format ................................................18<br />
11.1.3.2. Address .......................................................18<br />
11.1.3.3. Sniffer address ............................................18<br />
11.1.3.4. Name ..........................................................18<br />
11.1.3.5. Symbol ........................................................18<br />
11.1.3.6. Favourite lists ..............................................19<br />
11.1.3.7. Function mapping .......................................19<br />
11.1.3.8. Assigning functions with ECoSControl Radio . 19<br />
11.1.3.9. Speed steps / max speed display ..................19<br />
11.1.3.10. Direct changing of address and speed steps 19<br />
11.1.3.11. Extended decoder settings.........................19<br />
11.1.4. Indirect entry of a lo<strong>com</strong>otive .........................19<br />
11.2. Call up a lo<strong>com</strong>otive with the cab .....................20<br />
11.2.1. Swapping the cabs .........................................20<br />
11.2.2. Clearing a cab ................................................20<br />
11.3. Speedometer display options .............................20<br />
11.4. Deleting a loco ..................................................20<br />
11.5. Multi cab display ...............................................20<br />
11.8. Adjusting lo<strong>com</strong>otive parameters ......................21<br />
11.9. Interesting information on how to run a loco ....21<br />
11.9.1. Conflicts of addresses .....................................21<br />
11.9.2. „Locking“ - Exclusive access to lo<strong>com</strong>otives....21<br />
11.9.3. Address ranges - re<strong>com</strong>mendations ................21<br />
12. Operating consists ............................................21<br />
12.1. Add a new consist .............................................21<br />
12.2. Assigning a consist to a throttle .........................22<br />
12.3. Change parameters of consists ..........................22<br />
12.4. Deleting a consist ..............................................22<br />
12.5. Hints for running consists ..................................22<br />
13. Switching accessories .......................................22<br />
13.1. Enter new accessories........................................22<br />
13.1.1. Data format ...................................................22<br />
13.1.2. Name .............................................................22<br />
13.1.3. Number .........................................................22<br />
13.1.4. Symbol ...........................................................22<br />
13.1.5. Permanent versus momentary action buttons . 22<br />
13.1.6. Switching time ...............................................23<br />
13.2. Setting accessory parameters.............................23<br />
13.3. Creating a new link for an accessory .................23<br />
13.3.1. New link ........................................................23<br />
13.3.2. Delete a link ...................................................23<br />
13.3.3. Turn a symbol .................................................23<br />
13.4. Switch an accessory...........................................23<br />
13.5. Delete an accessory ...........................................24<br />
14. Turntable control ..............................................24<br />
14.1 Connecting the turntable ...................................24<br />
14.2. Generating a new turntable ..............................24<br />
14.2.1. Type of turntable ............................................24<br />
14.2.2. Name .............................................................24<br />
14.2.3. Address ..........................................................24<br />
14.2.4. Configuring tracks running off the turntable ..25<br />
14.3. Programming the turntable ...............................25<br />
14.4. Editing the turntable .........................................25<br />
14.5. Deleting a turntable ..........................................25<br />
14.6. Operating the turntable ....................................25<br />
14.7. Controlling the turntable with the ESU LokPilot ...25<br />
14.7.1. Configuring the turntable ..............................26<br />
15. Routes ..............................................................26<br />
15.1. Define new route ..............................................26<br />
15.1.1. Extended settings ...........................................26<br />
15.1.1.1. Name ..........................................................26<br />
15.1.1.2. Tact .............................................................26<br />
15.1.1.3. Trigger a route with an s88-contact .............26<br />
15.2. Edit a route .......................................................26<br />
15.3. Create a link to a route in the turnout control panel 27<br />
15.4. Switching a route ..............................................27<br />
15.5. Deleting a route ................................................27<br />
16. Track diagram switching panel..........................27<br />
16.1. Configuring the track diagram ..........................27<br />
16.1.1. Inserting track symbols ...................................27<br />
16.1.2. Insert an accessory .........................................27<br />
16.1.3. Insert a route ..................................................28<br />
16.1.4. References to other panels .............................28<br />
16.1.5. Turn elements ................................................28<br />
16.1.6. Mirroring turnouts .........................................28<br />
16.1.7. Delete symbols ...............................................28<br />
16.1.8. Change the name of the page .......................28


