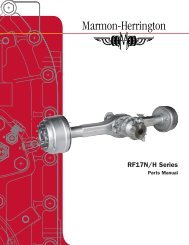
workshop manual rear axles rf17n/h r17n/h - Marmon-Herrington
workshop manual rear axles rf17n/h r17n/h - Marmon-Herrington
workshop manual rear axles rf17n/h r17n/h - Marmon-Herrington

Create successful ePaper yourself
Turn your PDF publications into a flip-book with our unique Google optimized e-Paper software.
A hídtest két szembenlév� furatába 1-1 db M12 axle body, then fit the differential assembly into the<br />
menet� vezet� ászokcsavart csavarunk, majd a axle housing and secure by hex. bolts (44) coated with<br />
f�hajtóm�vet visszaillesztjük a hídházba, SECTION és a menet- 282. thread locker.<br />
rögzít� anyaggal bevont hatlapfej� peremes csavarokkal<br />
REMOVING (44) rögzítjük. AND REINSTALLING THE MAIN DIFFERENTIAL<br />
Tighten the bolts diagonally to 100 - 110 Nm torque.<br />
It is recommended A csavarokat to remove átlós and sorrendben reinstall 100 the - 110 axle Nm nyomaply oil-proof surface sealant (LOCTITE 515) to flange<br />
shaft with the differential<br />
tékkal húzzuk<br />
lock<br />
meg.<br />
in engaged position. of the axle body and to connecting flange of the dif-<br />
Install the axle-shafts.<br />
ferential carrier I.<br />
A féltengelyeket szereljük be.<br />
Before removing the main differential from the axle<br />
drain the oil.<br />
283. FEJEZET<br />
Install one M12 stud bolt to two opposite bores in the<br />
axle body,<br />
SECTION<br />
then fit the<br />
283.<br />
differential assembly into the<br />
Remove the hex. flanged bolts (44) attaching the dif- axle housing and secure by hex. bolts (44) coated<br />
ferential carrier A assembly KAPCSOLÓAGYAK to the axle housing ÉS A and FEDÉL by LE- with ÉS thread REMOVING locker. AND REINSTALLING THE<br />
2 off M12 bolts FELSZERELÉSE, driven into the two threaded TÖMÍT�GY�R�K<br />
bores in<br />
COMPANION FLANGES AND THE<br />
the flange of the CSERÉLÉSE differential carrier A FEDÉLEN pull the differential Tighten the COVER, bolts diagonally REPLACING to 100 - 110 THE Nm OIL torque. SEALS IN<br />
carrier assembly out of the axle housing.<br />
THE COVER<br />
Install the axle-shafts.<br />
REINSTALLING A KAPCSOLÓAGY THE MAIN DIFFERENTIAL LESZERELÉSE<br />
At described in<br />
A<br />
the<br />
peremes<br />
“GENERAL<br />
koronás<br />
INSTRUCTIONS”<br />
anyát az ábrázolt<br />
ap-<br />
REMOVING THE COMPANION FLANGE<br />
szerszámokkal szereljük (1. ábra).<br />
�25,6<br />
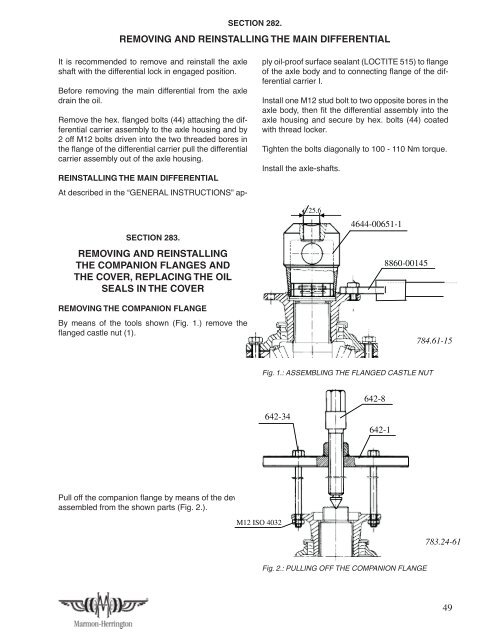
By means of the tools shown (Fig.<br />
1.) remove the flanged castle nut (1).<br />
SECTION 283.<br />
REMOVING AND REINSTALLING<br />
THE COMPANION FLANGES AND<br />
THE COVER, REPLACING THE OIL<br />
SEALS IN THE COVER<br />
REMOVING THE COMPANION FLANGE<br />
By means of the tools shown (Fig. 1.) remove the<br />
flanged castle 1. nut ábra: (1). PEREMES KORONÁS<br />
ANYA SZERELÉSE<br />
784.61-15<br />
Fig. 1.: ASSEMBLING THE<br />
A kapcsolóagyat az ábrázolt alkatrészekb�l Pull off the companion flange by means of th<br />
FLANGED CASTLE NUT<br />
összeállított készülékkel húzassuk le (2. ábra).<br />
assembled from the shown parts (Fig. 2.).<br />
Fig. 1.: ASSEMBLING THE FLANGED CASTLE NUT<br />
74<br />
Pull off the companion flange by means of the device<br />
assembled from the shown parts (Fig. 2.).<br />
642-34<br />
M12 ISO 4032<br />
TÖMÍT�GY�R�K CSERÉJE A FEDÉLBEN<br />
Hajtsuk ki a hatlapfej� csavarokat (6) és vegyük le a<br />
fedelet (5), és a hézagoló lemezeket (67).<br />
4644-00651-1<br />
642-8<br />
642-1<br />
8860-00145<br />
Fig. 2.: PULLING OFF THE COMPANION FLANGE<br />
2. ábra: A KAPCSOLÓAGY LEHÚZATÁSA<br />
Fig. 2.: PULLING OFF THE COMPANION FLANGE<br />
783.24-61<br />
REPLACING THE SEALING 49 RINGS<br />
COVER