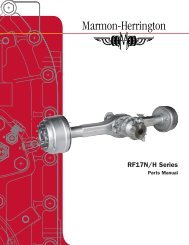
workshop manual rear axles rf17n/h r17n/h - Marmon-Herrington
workshop manual rear axles rf17n/h r17n/h - Marmon-Herrington
workshop manual rear axles rf17n/h r17n/h - Marmon-Herrington

You also want an ePaper? Increase the reach of your titles
YUMPU automatically turns print PDFs into web optimized ePapers that Google loves.
88<br />
Amennyiben a beállítás megfelel�, úgy ezután lehet az<br />
etalon tengelyr�l az alkatrészeket a meghajtó<br />
kúpkerékre átszerelni. Ügyeljünk arra, hogy a<br />
meghajtó kúpkerékre az el�z� beállításnál alkalmazott<br />
alkatrészek kerüljenek felszerelésre!<br />
A bels� kúpgörg�s csapágy (12) bels� részét üssük fel<br />
By means of the tools shown drive the cone of the<br />
az ábrázolt szerszámokkal a meghajtó kúpkerékre (8.<br />
inner taper roller bearing (12) onto the drive pinion<br />
ábra).<br />
(Fig. 8.).<br />
By means of the tools shown drive the cone of the<br />
Position inner the taper distance roller bearing sleeve (12) (11), onto the the previously drive pinion selected<br />
(Fig. distance 8.). ring (10) and the bearing cage subassembled<br />
with bearing cups to the drive pinion stem,<br />
them by means of press sleeve 4518-00022-4 drive<br />
on the outer taper roller bearing cone to bottom out<br />
while assuring proper connection of the bearings.<br />
By means of tool according to Fig. 2. of Section 313.<br />
press the companion flange (3) to the drive pinion.<br />
Screw on the flanged castle nut (1) and tighten to 650<br />
- 700 Nm torque.<br />
Check the rolling torque as described earlier. If deviation<br />
is experienced repeat the adjustment until obtaining<br />
the specified value.<br />
The oil seals (4) with the cover (5) are not installed<br />
during check.<br />
124<br />
SECTION 318.<br />
In case of proper adjustment relocate the parts from<br />
the master shaft to the drive pinion. Make sure to<br />
install only the parts used for the previous adjustment.<br />
4518-00022-3<br />
4518-00022-2<br />
583.10-40<br />
8. ábra: A BELS� KÚPGÖRG�S CSAPÁGY<br />
Fig. 8.: DRIVING ON THE INNER TAPER<br />
ROLLER BEARING<br />
BELS� RÉSZÉNEK<br />
CONE<br />
FELÜTÉSE<br />
Fig: 8.: DRIVING ON THE INNER TAPER<br />
ROLLER BEARING CONE<br />
REPAIRING, REINSTALLING, ADJUSTING THE DIFFERENTIAL LOCK<br />
REMOVING THE DIFFERENTIAL LOCK<br />
After detaching the pressure air connection and the<br />
electric wire remove the differential lock actuating<br />
pneumatic chamber by backing out the 2 off M8x16<br />
bolts and unscrew the shift bar (79) from threaded<br />
bore of the shift yoke (78).<br />
Pull the pilot pin (76) out of the differential carrier and<br />
remove the shift yoke (78) together with the toothed<br />
hub (33). Remove the spring (80) and stop washer<br />
(77), as well.<br />
REPAIRING THE PNEUMATIC CHAMBER<br />
Remove the clamp (72) clamping the housing (73)<br />
and the cover (70), then lift off the cover and the diapragm<br />
plate (71), as well. Pull the push rod - spring<br />
retainer unit out of the housing, thus setting free the<br />
spring (75).<br />
Using sound or replaced parts perform reassembly in<br />
reverse order of disassembly.<br />
ASSEMBLING INSTRUCTION FOR THE<br />
CLAMP<br />
- The pneumatic chamber housing (73), the diaphragm<br />
(71) and the cover (70), to be axially compressed in a<br />
device. A=7.2-7.5 mm<br />
- The clamp (72) halves to be radially compressed in<br />
a device so as both halves totally fit on the cover and<br />
housing. B=3.6-4.4mm<br />
- Nuts for the clamping bolts be tightened to 2.5 Nm<br />
torque the distance between the clamp ends-at both<br />
ends-be equal.<br />
When checked with 10 bar (10 kp/cm2) trial pressure,<br />
no air leakage is permitted.