AS9N010B.STB AS-93plus Service Manual.fm - LIQUID-scan GmbH ...
AS9N010B.STB AS-93plus Service Manual.fm - LIQUID-scan GmbH ...
AS9N010B.STB AS-93plus Service Manual.fm - LIQUID-scan GmbH ...

You also want an ePaper? Increase the reach of your titles
YUMPU automatically turns print PDFs into web optimized ePapers that Google loves.
1. Carefully turn over the autosampler to access the connector plate at<br />
the bottom (refer to illustration on page 15) and set all dip switches to<br />
OFF.<br />
2. Connect the cable of the 40 V plug-in power supply (see item 1 of<br />
illustration on page 15).<br />
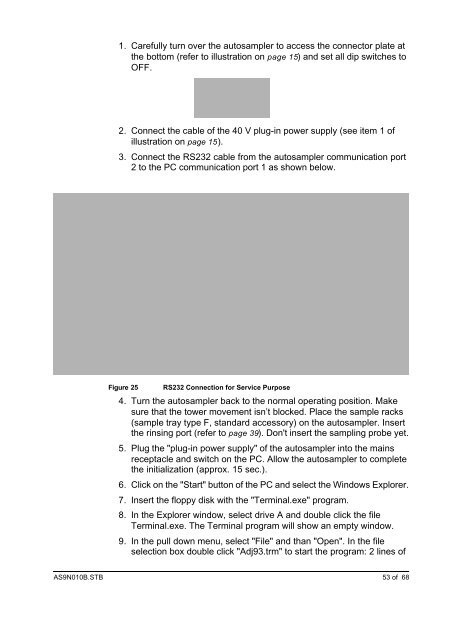
3. Connect the RS232 cable from the autosampler communication port<br />
2 to the PC communication port 1 as shown below.<br />
Figure 25 RS232 Connection for <strong>Service</strong> Purpose<br />
4. Turn the autosampler back to the normal operating position. Make<br />
sure that the tower movement isn’t blocked. Place the sample racks<br />
(sample tray type F, standard accessory) on the autosampler. Insert<br />
the rinsing port (refer to page 39). Don't insert the sampling probe yet.<br />
5. Plug the "plug-in power supply" of the autosampler into the mains<br />
receptacle and switch on the PC. Allow the autosampler to complete<br />
the initialization (approx. 15 sec.).<br />
6. Click on the "Start" button of the PC and select the Windows Explorer.<br />
7. Insert the floppy disk with the "Terminal.exe" program.<br />
8. In the Explorer window, select drive A and double click the file<br />
Terminal.exe. The Terminal program will show an empty window.<br />
9. In the pull down menu, select "File" and than "Open". In the file<br />
selection box double click "Adj93.trm" to start the program: 2 lines of<br />
<strong><strong>AS</strong>9N010B</strong>.<strong>STB</strong> 53 of 68