

Download the X-Plane 10 Manual - X-Plane.com
Download the X-Plane 10 Manual - X-Plane.com
Download the X-Plane 10 Manual - X-Plane.com

You also want an ePaper? Increase the reach of your titles
YUMPU automatically turns print PDFs into web optimized ePapers that Google loves.
4.8. CONFIGURING THE RENDERING OPTIONS 41<br />
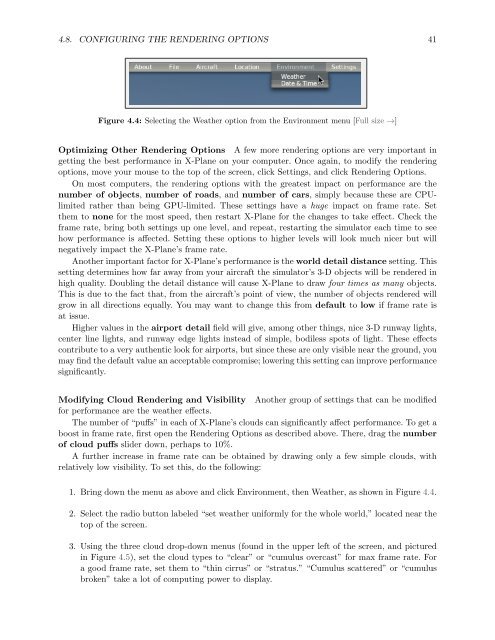
Figure 4.4: Selecting <strong>the</strong> Wea<strong>the</strong>r option from <strong>the</strong> Environment menu [Full size →]<br />
Optimizing O<strong>the</strong>r Rendering Options A few more rendering options are very important in<br />
getting <strong>the</strong> best performance in X-<strong>Plane</strong> on your <strong>com</strong>puter. Once again, to modify <strong>the</strong> rendering<br />
options, move your mouse to <strong>the</strong> top of <strong>the</strong> screen, click Settings, and click Rendering Options.<br />
On most <strong>com</strong>puters, <strong>the</strong> rendering options with <strong>the</strong> greatest impact on performance are <strong>the</strong><br />
number of objects, number of roads, and number of cars, simply because <strong>the</strong>se are CPUlimited<br />
ra<strong>the</strong>r than being GPU-limited. These settings have a huge impact on frame rate. Set<br />
<strong>the</strong>m to none for <strong>the</strong> most speed, <strong>the</strong>n restart X-<strong>Plane</strong> for <strong>the</strong> changes to take effect. Check <strong>the</strong><br />
frame rate, bring both settings up one level, and repeat, restarting <strong>the</strong> simulator each time to see<br />
how performance is affected. Setting <strong>the</strong>se options to higher levels will look much nicer but will<br />
negatively impact <strong>the</strong> X-<strong>Plane</strong>’s frame rate.<br />
Ano<strong>the</strong>r important factor for X-<strong>Plane</strong>’s performance is <strong>the</strong> world detail distance setting. This<br />
setting determines how far away from your aircraft <strong>the</strong> simulator’s 3-D objects will be rendered in<br />
high quality. Doubling <strong>the</strong> detail distance will cause X-<strong>Plane</strong> to draw four times as many objects.<br />
This is due to <strong>the</strong> fact that, from <strong>the</strong> aircraft’s point of view, <strong>the</strong> number of objects rendered will<br />
grow in all directions equally. You may want to change this from default to low if frame rate is<br />
at issue.<br />
Higher values in <strong>the</strong> airport detail field will give, among o<strong>the</strong>r things, nice 3-D runway lights,<br />
center line lights, and runway edge lights instead of simple, bodiless spots of light. These effects<br />
contribute to a very au<strong>the</strong>ntic look for airports, but since <strong>the</strong>se are only visible near <strong>the</strong> ground, you<br />
may find <strong>the</strong> default value an acceptable <strong>com</strong>promise; lowering this setting can improve performance<br />
significantly.<br />
Modifying Cloud Rendering and Visibility Ano<strong>the</strong>r group of settings that can be modified<br />
for performance are <strong>the</strong> wea<strong>the</strong>r effects.<br />
The number of “puffs” in each of X-<strong>Plane</strong>’s clouds can significantly affect performance. To get a<br />
boost in frame rate, first open <strong>the</strong> Rendering Options as described above. There, drag <strong>the</strong> number<br />
of cloud puffs slider down, perhaps to <strong>10</strong>%.<br />
A fur<strong>the</strong>r increase in frame rate can be obtained by drawing only a few simple clouds, with<br />
relatively low visibility. To set this, do <strong>the</strong> following:<br />
1. Bring down <strong>the</strong> menu as above and click Environment, <strong>the</strong>n Wea<strong>the</strong>r, as shown in Figure 4.4.<br />
2. Select <strong>the</strong> radio button labeled “set wea<strong>the</strong>r uniformly for <strong>the</strong> whole world,” located near <strong>the</strong><br />
top of <strong>the</strong> screen.<br />
3. Using <strong>the</strong> three cloud drop-down menus (found in <strong>the</strong> upper left of <strong>the</strong> screen, and pictured<br />
in Figure 4.5), set <strong>the</strong> cloud types to “clear” or “cumulus overcast” for max frame rate. For<br />
a good frame rate, set <strong>the</strong>m to “thin cirrus” or “stratus.” “Cumulus scattered” or “cumulus<br />
broken” take a lot of <strong>com</strong>puting power to display.


