MacFinish 2D-USB Handleiding
Hoofdstuk 1 - TimeTronics
Hoofdstuk 1 - TimeTronics
- No tags were found...

Create successful ePaper yourself
Turn your PDF publications into a flip-book with our unique Google optimized e-Paper software.
<strong>MacFinish</strong> <strong>2D</strong>-<strong>USB</strong> and MF8.x software Page 65<br />
Hoofdstuk 9.2 : Manually creating a .jpg file that<br />
you can use and print later.<br />
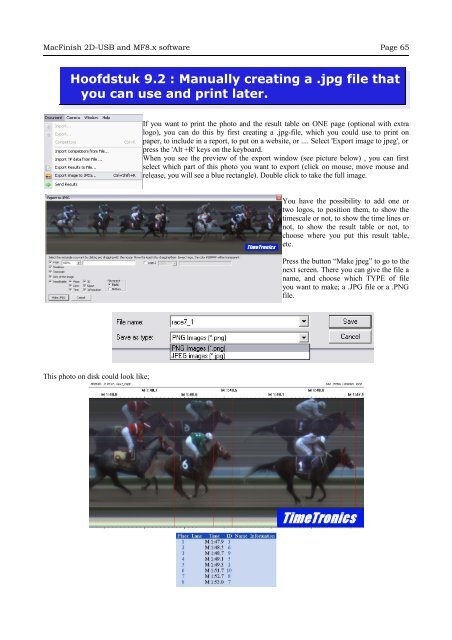
If you want to print the photo and the result table on ONE page (optional with extra<br />
logo), you can do this by first creating a .jpg-file, which you could use to print on<br />
paper, to include in a report, to put on a website, or .... Select 'Export image to jpeg', or<br />
press the 'Alt +R' keys on the keyboard.<br />
When you see the preview of the export window (see picture below) , you can first<br />
select which part of this photo you want to export (click on mouse, move mouse and<br />
release, you will see a blue rectangle). Double click to take the full image.<br />
You have the possibility to add one or<br />
two logos, to position them, to show the<br />
timescale or not, to show the time lines or<br />
not, to show the result table or not, to<br />
choose where you put this result table,<br />
etc.<br />
Press the button “Make jpeg” to go to the<br />
next screen. There you can give the file a<br />
name, and choose which TYPE of file<br />
you want to make; a .JPG file or a .PNG<br />
file.<br />
This photo on disk could look like;