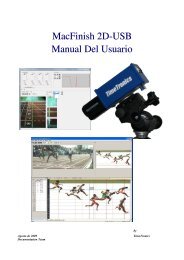
MacFinish 2D-USB Handleiding
Hoofdstuk 1 - TimeTronics
Hoofdstuk 1 - TimeTronics
- No tags were found...

Create successful ePaper yourself
Turn your PDF publications into a flip-book with our unique Google optimized e-Paper software.
Page 80<br />
<strong>MacFinish</strong> <strong>2D</strong>-<strong>USB</strong> and MF8.x software<br />
Now you can also calibrate the 'black offset'. Select a 'black' part on the photo and click the black rectangle on the<br />
bottom of the 'Tools' window. After you have done this, the new values under ‘Gain’ and ‘Offset’ will be automatically<br />
displayed.<br />
The RGB color calibration is also applicable to the Scrolling camera view window! We recommend you to use this<br />
feature because this color calibration will be valid for all the following recorded pictures !<br />
When saving this picture after you changed the color-calibration numbers, these new adjustments will be saved as well.<br />
The original data are always preserved meaning that you can always return to the original recording if desired.<br />
Hoofdstuk 11.5.2 : Camera Control Window<br />
The picture above-right shows the basic “Camera control window”, not yet further opened.<br />
It can be used to live control the camera sensitivity and the camera color calibration, but also to live control the<br />
(optional) motorized lens. Such a motorized lens has 3 motors for iris (light control), zoom, and focus (to record sharp<br />
pictures). You also choose to press the “auto-iris” button and/or the “auto-focus” button.<br />
Note; The “auto-iris” button will make the <strong>MacFinish</strong> camera permanently control the motorized iris of the lens to let<br />
the photo have an average intensity equal to the moment that you pressed the button. When you switch the “auto-iris”<br />
function ON, the manual iris control buttons are made invisible. Of course it is possible to switch this auto-iris function<br />
OFF again.