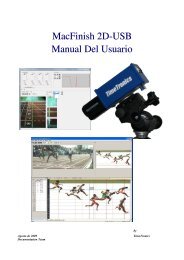
MacFinish 2D-USB Handleiding
Hoofdstuk 1 - TimeTronics
Hoofdstuk 1 - TimeTronics
- No tags were found...

Create successful ePaper yourself
Turn your PDF publications into a flip-book with our unique Google optimized e-Paper software.
Page 58<br />
<strong>MacFinish</strong> <strong>2D</strong>-<strong>USB</strong> and MF8.x software<br />
Hoofdstuk 8.2 : Filling the 'Results table'<br />
Lane Popup Menu<br />
The second column we call the "Identification" column, where we need to fill in the identification of the athlete.<br />
Normally you will use lane numbers for 'sprint' races that are run in lanes, and ID's or HIP numbers for 'long distance'<br />
races , in which the competitors do not finish in separate lanes, but normally all in lane 1.<br />
Click the small vertical arrow in the 'Lane' column, which will reveal a 'Lane/Hip/ID' popup menu. Select the item that<br />
you wish to use to fill in the result table, using the RIGHT MOUSE BUTTON.<br />
Lane = lane number.<br />
Hip = hip number, usually coinciding with the lane number.<br />
ID = a registration / identification number (might be the chest number or a fixed ID federation number of the<br />
athlete).<br />
ID+Lane = Will show both the athlete ID and the lane number.<br />
Hoofdstuk 8.2.1 : Races Finishing in Lanes<br />
Note; Before you start filling in the results, make sure that the lane indication fields in the photo are correctly<br />
positioned! Do remember that it is the best to align these 'lane indicators' in the 'Scrolling camera view' window,<br />
BEFORE the race. This way you will have to do this only once, as these alignments will then be used for all the next<br />
photo recordings also!<br />
To select a random field in the result table, just click in it! The field is now highlighted ( = selected). The 'fill' color will<br />
depend on your system settings (Windows. First click in the field which is to be entered under “Lane“:<br />
Next, press the 'Control'-key and click the mouse in the correct 'Lane'-field, lane 5 in the example below;<br />
'Control'-key + click in ‘Lane’ field