3000 Series OM (Nov.08).qxd:12MAY3000OM.qxd - Audio-Technica
3000 Series OM (Nov.08).qxd:12MAY3000OM.qxd - Audio-Technica
3000 Series OM (Nov.08).qxd:12MAY3000OM.qxd - Audio-Technica

You also want an ePaper? Increase the reach of your titles
YUMPU automatically turns print PDFs into web optimized ePapers that Google loves.
E<br />
N<br />
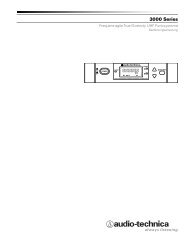
Transmitter Setup<br />
Battery Selection and Installation<br />
Each transmitter uses two 1.5V AA batteries, not included. Alkaline type is<br />
recommended. Always replace both batteries. Make certain the transmitter power is<br />
Off before replacing batteries.<br />
UniPak Transmitter Battery Installation<br />
1. Open the battery compartment door by sliding the catch down (Fig. K). (If no<br />
batteries are inside, the door will not spring open by itself.)<br />
2. Observe correct polarity as marked on the metal contacts on the door and<br />
carefully insert two fresh 1.5V AA alkaline batteries (Fig. L).<br />
3. Close the door, making certain the latch clicks securely in place.<br />
Handheld Transmitter Battery Installation<br />
1. While holding the lower body cover (near the LCD window), grasp the upper part<br />
of the transmitter body just below the grille and unscrew it at least four complete<br />
turns (Fig. G); then slide the lower body cover down until it stops (Fig. H). Once the<br />
cover has been lowered, turn the transmitter over to reveal the battery<br />
compartment on the side opposite the LCD window.<br />
2. Observe correct polarity as marked inside the battery compartment and car<br />
fully insert two fresh 1.5V AA alkaline batteries (Fig. M). Insert the first battery and<br />
slide it down. Then insert the second battery, bottom first, into the space<br />
remaining. Make certain the batteries are fully seated in the battery compartment.<br />
3. Slide the lower body cover back up the body, then screw the housing together. Do<br />
not overtighten.<br />
Note: Remove batteries from the handheld transmitter starting at the bottom (– end) of<br />
the top battery (Fig. M). The top (+ end) of the top battery is captured in a recess and<br />
will not come straight out.<br />
Battery Condition Indicator<br />
After the batteries are installed, turn the power on by pressing and holding the<br />
Power/Mute button. The small red power-on LED (Fig. E/F) should light and the LCD<br />
window should come on. If this does not happen, the batteries are installed incorrectly<br />
or they are dead. The transmitter’s “fuel gauge” battery indicator displays a maximum of<br />
four bar segments. When it flashes “LOW.BAT”, the batteries should be replaced<br />
immediately to ensure continued operation. (The receiver also displays transmitter<br />
battery condition in the LCD window with bar segments; the Alert indicator comes on to<br />
warn of a low-battery condition.)<br />
UniPak Transmitter Input Connection<br />
Connect an audio input device (microphone or guitar cable) to the audio input jack on<br />
the top of the transmitter. A number of <strong>Audio</strong>-<strong>Technica</strong> professional microphones and<br />
cables are available separately, pre-terminated with a UniPak input connector (see<br />
“Optional System Accessories” on page 13). The cable connector latches automatically<br />
when inserted into the transmitter jack. To unlatch and remove the connector, simply<br />
pull up on the connector’s knurled metal collar.<br />
UniPak Transmitter Antenna<br />
The UniPak transmitter includes a field-replaceable flexible antenna. For best results,<br />
allow the antenna to hang freely and full length from the top of the transmitter. If the<br />
received signal is marginal, experiment with different transmitter positions on your body<br />
or instrument; or try repositioning the receiver or using remote receiver antennas. Since<br />
the transmitter antenna simply screws in, check it occasionally to make certain it is<br />
snugly attached (finger-tight). Do not change the length of the transmitting antenna.<br />
Handheld Transmitter Antenna<br />
The antenna for the handheld mic/transmitter is in the black, non-metallic section at the<br />
bottom of the unit (Fig. F). For best results, hold the mic/transmitter naturally, around its<br />
painted metal case; holding or otherwise covering the antenna housing may affect<br />
operating range.<br />
UniPak Transmitter Mounting Clip<br />
The UniPak transmitter’s mounting clip may be installed with the case positioned either<br />
“up” or “down,” depending upon which is preferred for the application. To turn the clip<br />
around, spring the ends of the clip out of the two holes on the sides of the transmitter<br />
case (Fig. E) and reinstall it facing in the opposite direction.<br />
System Operation<br />
Switch on the receiver. Do not switch on the transmitter yet.<br />
Selecting/Setting Frequency<br />
Selection of the desired operating frequency is made through the function menus. It’s<br />
usually best to start by setting the receiver’s frequency, to determine there is no local<br />
interference on that frequency. Then, always make certain to set the transmitter to the<br />
receiver’s exact frequency. The receiver’s unique Digital Tone Lock system squelches<br />
the audio only, permitting any RF energy on the frequency to show on the “RF” barmeter.<br />
Receiver On<br />
The Alert indicator and the LCD window will light up; the normal-operation LCD display<br />
will appear after 1-2 seconds (Fig. D-1). If any of the bars show in the “RF” bar-graph<br />
meter, there may be RF interference in the area. If this occurs, select another<br />
frequency as explained below. (If the Meter Hold function has been selected, one of<br />
the RF bars will be flashing, indicating the lowest RF level received.)<br />
E Band Frequency Scan Group Selection<br />
To select frequency Scan Group G1, G2 or G3 (example page 16). With the power off,<br />
Press and hold upper arrow key while powering on. Select the required Frequency<br />
Scan Group G1, G2 or G3 by pressing the "Mode/Set Button" until the desired group<br />
appears in the display.To store the selected frequency Scan Group, press the power<br />
switch to turn the receiver OFF, then press the power switch to turn the power on.<br />
Using the Automatic Scan Function to Set Receiver Frequency<br />
Automatically<br />
1. Press the Mode/Set button once; then the “RF” and “AF” scales will<br />
disappear from the window and only the frequency will appear in the LCD<br />
window. (The receiver is now in the Menu mode.) See Figure D-2.<br />
2. Use the Up arrow button to reach Scan 1, Scan 2, or Scan 3. Press the Mode/Set<br />
button once to select one of these three Scan groups. The lowest frequency in<br />
the selected Scan group will appear in the LCD window.<br />
3. Press the Up or Down arrow button to begin the scan. The word “SCAN1”,<br />
“SCAN2” or “SCAN3” will flash in the LCD window, depending on which Scan<br />
group you selected in step 2.<br />
* Select then press the up arrow button to scan start from bottom or Down arrow<br />
button to start from Top.<br />
4. The first available frequency will flash in the LCD window. To activate this<br />
frequency selection, press and hold the Mode/Set button until the word<br />
“STORED” appears in the LCD window. (If you do not wish to complete this<br />
particular selection, just press the Mode/Set button once. The word “ESCAPE”<br />
will appear briefly in the window and the receiver will return to the Menu mode.)<br />
5. After you have activated your frequency selection (step 4), the “RF” and “AF”<br />
scales will reappear in the window, indicating the return to normal operation.<br />
6. If you are using multiple systems, after completing the first receiver's scan and<br />
frequency selection, set the transmitter to the same frequency (see Setting<br />
Transmitter Frequency instructions on page 11); leave the transmitter On, and<br />
run the next receiver’s automatic scan function. Always set a receiver-transmitter<br />
pair to the same frequency before using the automatic scan function to select a<br />
frequency for the next receiver.<br />
* Note: Make certain that prior to powering on the matched transmitter, press and hold<br />
the R3100 Mode/Set button to store the frequency selected, otherwise the receiver will<br />
re-scan to find another Open/Clear frequency.<br />
See illustration figures<br />
10