3000 Series OM (Nov.08).qxd:12MAY3000OM.qxd - Audio-Technica
3000 Series OM (Nov.08).qxd:12MAY3000OM.qxd - Audio-Technica
3000 Series OM (Nov.08).qxd:12MAY3000OM.qxd - Audio-Technica

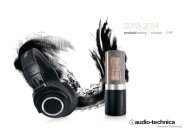
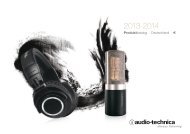
You also want an ePaper? Increase the reach of your titles
YUMPU automatically turns print PDFs into web optimized ePapers that Google loves.
Power/Mute Locks<br />
Programmable Power/Mute Locks limit the functioning of the Power/Mute button as<br />
desired for particular users and/or applications. Power can be locked On; Mute can be<br />
locked Off. Selection of the desired locks, if any, is made through the function menu:<br />
Setting<br />
NO.LOC<br />
Transmitter Controls And Functions (continued)<br />
Description<br />
The normal Power and Mute functions are fully operational.<br />
Setting <strong>Audio</strong> Input Level<br />
ATW-T310 and ATW T341 transmitter<br />
A 4-position audio input gain setting, selected through the function menu, serves to<br />
match the audio input level to the transmitter for best modulation with minimum<br />
distortion.<br />
Available choices are +12 dB, +6 dB, 0 dB and –6 dB. The default value is +6 dB. Select<br />
the highest setting that does not result in over-modulation with the highest<br />
audio/instrument input levels (an AF indication on the receiver no higher than “0”);<br />
watch the receiver’s “AF” meter “+3/+6” indications and the Alert light to make certain<br />
they are not triggered by the highest audio levels.<br />
E<br />
N<br />
ALL.LOC<br />
MUT.LOC<br />
PWR.LOC<br />
Both the Power and Mute functions are locked into their status as of<br />
the time “ALL.LOC” is applied.<br />
(Power On, and Mute either On or Off.)<br />
Note: ALL.LOC must be re-accessed and the setting changed to turn<br />
the transmitter off.<br />
In this mode, the audio cannot be muted. The Power functioning is<br />
unaffected. (If MUT.LOC is applied while the transmitter is muted,<br />
pressing the Power/Mute button once will return to un-muted<br />
operation; thereafter the Mute function is disabled until the setting is<br />
changed again.)<br />
Power is locked On as of the time “PWR.LOC” is applied. The Mute<br />
functioning is unaffected. Note: When in the PWR.LOC mode, the<br />
transmitter may be turned off by: (1) Re-accessing the .LOC Menu<br />
and changing the setting, or (2) Removing and re-installing the<br />
batteries. When the transmitter is turned on again, it will power-up in<br />
the NO.LOC mode. (Only the PWR. LOC function will change when<br />
batteries are removed; all other settings remain stored in memory.)<br />
The transmitter’s normally-on red LED power indicator will blink off if the peak audio<br />
input exceeds the maximum desirable level.<br />
ATW-T371 transmitter<br />
A 3-position audio input gain setting, selected through the function menu, serves to<br />
match the audio input level to the transmitter for best modulation with minimum<br />
distortion.<br />
Available choices are +12 dB, +6dB and 0dB. the default value is +6 dB. In addition, a<br />
mechanical pad switch on the condenser capsule (inside the screw-on wire mesh<br />
grille) can provide another 6dB of attenuation. For best performance, adjust the input<br />
level using the function menu choices, keeping the capsule´s mechanical switch at<br />
0dB. If more audio attenuation is needed, set the capsule´s pad switch to -6 dB.<br />
Restore Default Settings<br />
A “PRESET” selection in the menu permits resetting of all transmitter functions to their<br />
factory-default values.<br />
1. Press the Set button once to move to Menu mode.<br />
If an attempt is made to take an action that currently is locked out,<br />
the LCD will display “LOC.KED” briefly, then return to its previouslydisplayed<br />
contents.<br />
2. Press the Up arrow twice to move to “PRESET” in the LCD window.<br />
3. Press the Set button once and “LOAD” will appear in the LCD.<br />
<strong>Audio</strong> Input Selector<br />
The UniPak body-pack transmitter provides input connections for both lowimpedance<br />
(Lo-Z) microphones and high-impedance (Hi-Z) instruments. A wide range<br />
of <strong>Audio</strong>-<strong>Technica</strong> Wireless Essentials microphones and cables is available preterminated<br />
with the appropriate professional latching connector. (See page 13.)<br />
Selection of the desired input – microphone or instrument – is made through the<br />
function menu. Depending upon the input selected, a small “MIC” or “INST” will show<br />
in the LCD window, just below the frequency. (In the handheld transmitter, only “MIC”<br />
will show in the LCD window.)<br />
4. Press and hold the Set button until “DEF” appears in the LCD.<br />
5. Press and hold the Set button until “LOADED” appears briefly in the LCD.<br />
The window will then revert to “PRESET”.<br />
6. Press the Down arrow once to move to “QUIT”.<br />
7. Press the Set button once to exit the Menu mode and return to normal operation,<br />
with all factory-default settings restored.<br />
8