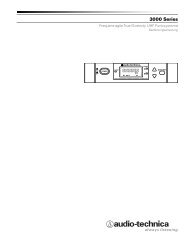
3000 Series OM (Nov.08).qxd:12MAY3000OM.qxd - Audio-Technica
3000 Series OM (Nov.08).qxd:12MAY3000OM.qxd - Audio-Technica
3000 Series OM (Nov.08).qxd:12MAY3000OM.qxd - Audio-Technica

You also want an ePaper? Increase the reach of your titles
YUMPU automatically turns print PDFs into web optimized ePapers that Google loves.
Setting Receiver Frequency Manually<br />
1. Press the Mode/Set button once; then only the frequency will appear in the LCD<br />
window. (The receiver is now in the Menu mode.) See Figure D-2.<br />
2. Press the Mode/Set button again; the Alert light will come on and the frequency in<br />
the window will flash. (The receiver is now in the Edit mode, Fig. D-3.)<br />
3. Use the Up/Down arrow buttons to change the frequency. Press either arrow for<br />
single steps, or hold down either arrow for rapid cycling through the band.<br />
Frequencies “wrap around” to the other end of the range when the top or bottom<br />
of the band is reached. Choose a frequency appropriate for your area, avoiding<br />
frequencies with active TV channels. (See the frequency listings from page 14)<br />
4. To activate this frequency selection, press and hold the Mode/Set button until the<br />
word “STORED” appears in the receiver’s window. (If you do not wish to<br />
complete this particular selection, just press the Mode/Set button once. The word<br />
“ESCAPE” will appear briefly in the window and the receiver will return to the<br />
Menu mode.)<br />
5. When finished entering a frequency, press the Down arrow button once to move<br />
to “QUIT”. Then press the Mode/Set button once to exit the menu. The “RF” and<br />
“AF” scales will reappear in the window, indicating the return to normal<br />
operation.<br />
Transmitter On<br />
Turn on the transmitter by pressing and holding the Power/Mute button (Fig. E/F) for a<br />
second or two, until the red power indicator and the LCD window have come on.<br />
Setting Transmitter Frequency<br />
1. Press the Set button once and the small word “MENU” will appear above the<br />
frequency. Press the Set button again and the small flashing word “EDIT” will<br />
appear to the right of “MENU”. See Figures J-3 and J-4.<br />
2. Use the Up/Down arrow buttons to change the transmitter frequency. Press either<br />
arrow for single steps, or hold down either arrow for rapid cycling through the<br />
range. Frequencies “wrap around” when the top or bottom of the band is<br />
reached. Select the exact frequency displayed on the receiver.<br />
3. To activate this frequency selection, press and hold the Set button until the word<br />
“STORED” appears in the transmitter’s window. (If you do not wish to complete<br />
this selection, just press the Set button once: the word “ESCAPE” will appear<br />
briefly in the window and the transmitter will return to the Menu mode.)<br />
4. When finished entering a frequency, press the Up arrow button once to move to<br />
“QUIT”. Then press the Set button once to exit the menu. The word “MENU” in<br />
the transmitter window will go off, indicating the return to normal operation.<br />
When the transmitter is switched on and in normal operation, the receiver’s “RF”<br />
signal-level bars will display from bottom to top, with more bars indicating increased<br />
signal reception. For optimum performance at least four, and preferably five or more, of<br />
the RF indicators should be displayed.<br />
Setting Levels<br />
Correct adjustment of transmitter audio input, receiver audio output, and<br />
mixer/amplifier input and output levels is important for optimum system performance.<br />
Set Transmitter <strong>Audio</strong> Input Level<br />
ATW-T310 and ATW T341 transmitter<br />
A 4-position audio input gain setting, selected through the function menu, serves to<br />
match the audio input level to the transmitter for best modulation with minimum<br />
distortion.<br />
Available choices are +12 dB, +6 dB, 0 dB and –6 dB. The default setting is +6 dB.<br />
Select the highest setting that does not result in over-modulation with the highest<br />
audio/instrument input levels (an AF indication on the receiver no higher than “0”);<br />
watch the receiver’s “AF” bar-graph “+3/+6” indications and the Alert light, to make<br />
certain that they are not triggered by the highest audio levels.<br />
The transmitter’s normally-on red LED power indicator will blink off if the peak audio<br />
input exceeds the maximum desirable level.<br />
ATW-T371 transmitter<br />
A 3-position audio input gain setting, selected through the function menu, serves to<br />
match the audio input level to the transmitter for best modulation with minimum<br />
disortion.<br />
Available choices are +12 dB, +6dB and 0dB. the default value is +6 dB. In addition, a<br />
mechanical pad switch on the condenser capsule (inside the screw-on wire mesh<br />
grille) can provide another 6dB of attenuation. For best performance, adjust the input<br />
level using the function menu choices, keeping the capsule´s mechanical switch at<br />
0dB. If more audio attenuation is needed, set the capsule´s pad switch to -6 dB.<br />
RF Power Adjustment<br />
ATW-T310 Unipak RF Power Adjustment may be set to “RF HI” (30 mW nominal) or “RF<br />
LOW” (10 mW nominal) through the function menu. The default setting is “RF LOW”.<br />
While the High setting normally provides maximum operating range, the Low setting<br />
will help extend battery life. The Low setting may also be preferred in multi-channel<br />
systems, or when operating very close to the receiver, to reduce the possibility of<br />
interference or overload.<br />
RF Interference<br />
Please note that wireless frequencies are shared with other radio services. According<br />
to the National Regulations. “Wireless microphone operations are unprotected from<br />
interference from other licensed operations in the band. If any interference is received<br />
by any Government or non-Government operation, the wireless microphone must<br />
cease operation...”<br />
If you need assistance with operation or frequency selection, please contact your<br />
dealer. Extensive wireless information also is available on the <strong>Audio</strong>-<strong>Technica</strong> web site<br />
at www.audio-technica.com.<br />
E<br />
N<br />
11