User's Guide
User's Guide
User's Guide

Create successful ePaper yourself
Turn your PDF publications into a flip-book with our unique Google optimized e-Paper software.
Working with Pictures (i.e., Free Pictures)<br />
Pictures: General Information<br />
Pictures are added to an overlay by inserting pictures from Overlay Maker 3’s Picture<br />
Library, inserting pictures from other sources (such as digital photographs), or by pasting<br />
pictures from your clipboard.<br />
Each picture has properties, enabling it to be flipped or rotated. Picture objects are not<br />
interactive—pressing one will not result in an on-screen action.<br />
Why add pictures to an overlay?<br />
For identification, instructional and/or decorative purposes, it is often useful to add one or<br />
more pictures to a printed overlay in addition to, or instead of, the pictures that appear on<br />
keys.<br />
Using the Arrange feature, it is possible to position a picture behind or in front of keys and<br />
other objects.<br />
Can I add a large picture to the overlay in place of a background?<br />
Yes. Place the picture on the overlay, enlarge the picture if needed, and use the Send to<br />
Back feature to place the picture behind all other objects on the overlay.<br />
The picture will appear to be on the background, even if it is not on the actual background<br />
layer.<br />
Picture: Inserting/Pasting on an Overlay<br />
How do I place a picture on an overlay?<br />
There are multiple ways to place a picture on an overlay:<br />
Inserting a Picture From the Picture Library<br />
With no objects on the overlay selected:<br />
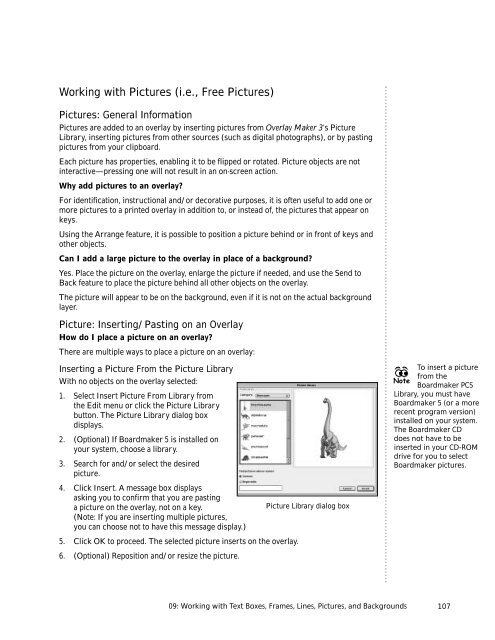
1. Select Insert Picture From Library from<br />
the Edit menu or click the Picture Library<br />
button. The Picture Library dialog box<br />
displays.<br />
2. (Optional) If Boardmaker 5 is installed on<br />
your system, choose a library.<br />
3. Search for and/or select the desired<br />
picture.<br />
4. Click Insert. A message box displays<br />
asking you to confirm that you are pasting<br />
a picture on the overlay, not on a key.<br />
Picture Library dialog box<br />
(Note: If you are inserting multiple pictures,<br />
you can choose not to have this message display.)<br />
5. Click OK to proceed. The selected picture inserts on the overlay.<br />
6. (Optional) Reposition and/or resize the picture.<br />
To insert a picture<br />
from the<br />
Note<br />
Boardmaker PCS<br />
Library, you must have<br />
Boardmaker 5 (or a more<br />
recent program version)<br />
installed on your system.<br />
The Boardmaker CD<br />
does not have to be<br />
inserted in your CD-ROM<br />
drive for you to select<br />
Boardmaker pictures.<br />
09: Working with Text Boxes, Frames, Lines, Pictures, and Backgrounds<br />
107