User's Guide
User's Guide
User's Guide

Create successful ePaper yourself
Turn your PDF publications into a flip-book with our unique Google optimized e-Paper software.
If, after creating<br />
Note<br />
an overlay, you<br />
rename existing<br />
toolbars in a document,<br />
create new buttons, or<br />
delete buttons, you need<br />
to remake the overlay<br />
using the instructions on<br />
this page.<br />
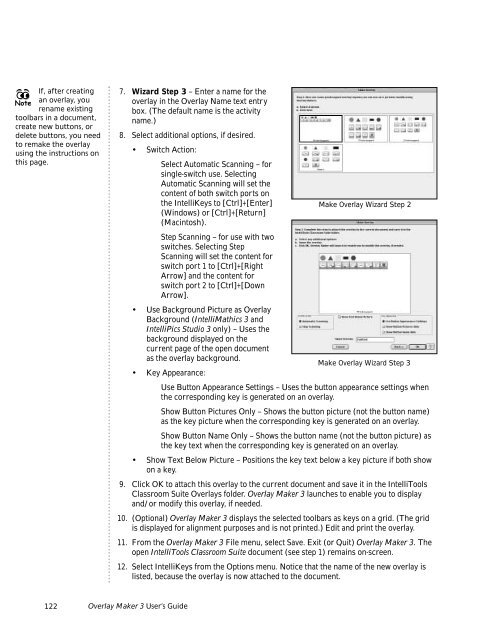
7. Wizard Step 3 – Enter a name for the<br />
overlay in the Overlay Name text entry<br />
box. (The default name is the activity<br />
name.)<br />
8. Select additional options, if desired.<br />
• Switch Action:<br />
Select Automatic Scanning – for<br />
single-switch use. Selecting<br />
Automatic Scanning will set the<br />
content of both switch ports on<br />
the IntelliKeys to [Ctrl]+[Enter]<br />
Make Overlay Wizard Step 2<br />
(Windows) or [Ctrl]+[Return]<br />
(Macintosh).<br />
Step Scanning – for use with two<br />
switches. Selecting Step<br />
Scanning will set the content for<br />
switch port 1 to [Ctrl]+[Right<br />
Arrow] and the content for<br />
switch port 2 to [Ctrl]+[Down<br />
Arrow].<br />
• Use Background Picture as Overlay<br />
Background (IntelliMathics 3 and<br />
IntelliPics Studio 3 only) – Uses the<br />
background displayed on the<br />
current page of the open document<br />
as the overlay background.<br />
Make Overlay Wizard Step 3<br />
• Key Appearance:<br />
Use Button Appearance Settings – Uses the button appearance settings when<br />
the corresponding key is generated on an overlay.<br />
Show Button Pictures Only – Shows the button picture (not the button name)<br />
as the key picture when the corresponding key is generated on an overlay.<br />
Show Button Name Only – Shows the button name (not the button picture) as<br />
the key text when the corresponding key is generated on an overlay.<br />
• Show Text Below Picture – Positions the key text below a key picture if both show<br />
on a key.<br />
9. Click OK to attach this overlay to the current document and save it in the IntelliTools<br />
Classroom Suite Overlays folder. Overlay Maker 3 launches to enable you to display<br />
and/or modify this overlay, if needed.<br />
10. (Optional) Overlay Maker 3 displays the selected toolbars as keys on a grid. (The grid<br />
is displayed for alignment purposes and is not printed.) Edit and print the overlay.<br />
11. From the Overlay Maker 3 File menu, select Save. Exit (or Quit) Overlay Maker 3. The<br />
open IntelliTools Classroom Suite document (see step 1) remains on-screen.<br />
12. Select IntelliKeys from the Options menu. Notice that the name of the new overlay is<br />
listed, because the overlay is now attached to the document.<br />
122 Overlay Maker 3 User’s <strong>Guide</strong>