Palette VL
Palette VL
Palette VL

Create successful ePaper yourself
Turn your PDF publications into a flip-book with our unique Google optimized e-Paper software.
<strong>Palette</strong> <strong>VL</strong><br />
LIGHTING CONTROL CONSOLE INSTALLATION & SETUP GUIDE<br />
The following properties are optional:<br />
[S1] - If needed, select the "Cue List" to record to. The default is the cue list you currently have selected.<br />
[S3] - Change the "Record" option if needed. The default option is to record your Live as exactly what you<br />
see on stage coming from the selected cue list. To find out what the other options mean and when to use<br />
them, refer to the PALETTE <strong>VL</strong> Software Help Menu.<br />
[S4] - Enter a Cue Label. This label will appear in the Cue List next to the cue (optional).<br />
[S5] - Change the Default Cue Time. This box will automatically be stuffed with the value from the Default<br />
Cue List Options.<br />
[S6] - If you don't enter a Down Time, the Down Time will be the Cue time. If you do enter a Down Time,<br />
the Cue Time is equivalent to the Up Time. If you need the cue to wait a specified amount of time before it<br />
starts to fade (either Up or Down), use the Wait/Fade syntax in the time field.<br />
[S7] - If you are recording to an existing cue and want to update in the changes, select "Update." Updating<br />
means that the new data will be merged into the existing cue, not destroying data that is currently there. If<br />
you are recording to an existing cue and don't select "Update," you will see the dialog box shown below<br />
after you press [ENTER].<br />
[S8] - Check "Record Minus Subs" if you don't want to pull in levels from recorded submasters that are<br />
active on stage.<br />
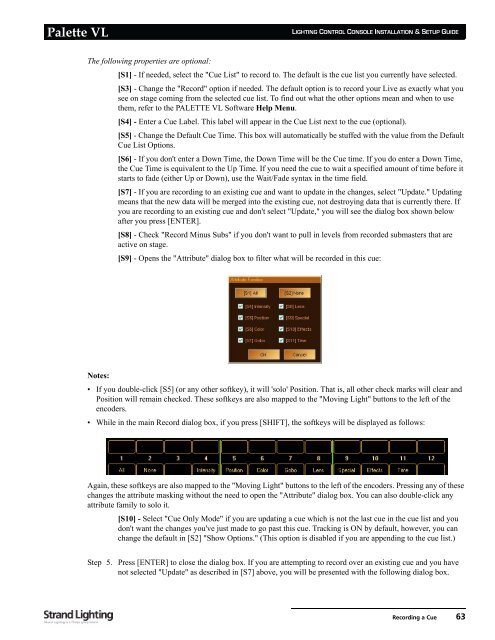
[S9] - Opens the "Attribute" dialog box to filter what will be recorded in this cue:<br />
Notes:<br />
• If you double-click [S5] (or any other softkey), it will 'solo' Position. That is, all other check marks will clear and<br />
Position will remain checked. These softkeys are also mapped to the "Moving Light" buttons to the left of the<br />
encoders.<br />
• While in the main Record dialog box, if you press [SHIFT], the softkeys will be displayed as follows:<br />
Again, these softkeys are also mapped to the "Moving Light" buttons to the left of the encoders. Pressing any of these<br />
changes the attribute masking without the need to open the "Attribute" dialog box. You can also double-click any<br />
attribute family to solo it.<br />
[S10] - Select "Cue Only Mode" if you are updating a cue which is not the last cue in the cue list and you<br />
don't want the changes you've just made to go past this cue. Tracking is ON by default, however, you can<br />
change the default in [S2] "Show Options." (This option is disabled if you are appending to the cue list.)<br />
Step 5. Press [ENTER] to close the dialog box. If you are attempting to record over an existing cue and you have<br />
not selected "Update" as described in [S7] above, you will be presented with the following dialog box.<br />
Recording a Cue 63