- Page 1:
DCC 6526L/6626L User Manual DCC 652
- Page 4 and 5:
Safety Conventions in This Guide Th
- Page 6 and 7:
iii Contents Print Override . . . .
- Page 8 and 9:
Quick Guide To make copies To print
- Page 10 and 11:
To send a FAX (Only on products wit
- Page 12 and 13:
ix Subject Entry (page 5-22) JobFin
- Page 14 and 15:
Status/Job Cancel key Print Job Sta
- Page 16 and 17:
User/Job Account xiii Host Name IPP
- Page 18 and 19:
xv Custom PaperSize Cassette 2 Set.
- Page 20 and 21:
Login Operation Optional Memory RAM
- Page 22 and 23:
Edit Destination Address Book Adjus
- Page 24 and 25:
Environment The service environment
- Page 26 and 27:
Other precautions Return the exhaus
- Page 28 and 29:
Legal Restriction on Copying/Scanni
- Page 30 and 31:
Legal and Safety Information Please
- Page 32 and 33:
GPL/LGPL This product contains GPL
- Page 34 and 35:
Monotype Imaging License Agreement
- Page 36 and 37:
About this Operation Guide This Ope
- Page 38 and 39:
Conventions in This Guide The follo
- Page 40 and 41:
1 Part Names This chapter identifie
- Page 42 and 43:
Used to select a menu item, move th
- Page 44 and 45:
20 Fuser Cover 21 Paper Transfer Un
- Page 46 and 47:
2 Preparation before Use This chapt
- Page 48 and 49:
Determining the Connection Method a
- Page 50 and 51:
Connecting Cables Follow the steps
- Page 52 and 53:
Power On/Off Power On When the main
- Page 54 and 55:
Sleep and Auto Sleep Sleep Auto Sle
- Page 56 and 57:
Setting Date and Time Follow the st
- Page 58 and 59:
Date Setting: a b *****************
- Page 60 and 61:
System: a b ********************* 1
- Page 62 and 63:
Use the procedure below to setup th
- Page 64 and 65:
IPv4 Setting: 1 DHCP a b **********
- Page 66 and 67:
IPv4 Setting: 3 IP Address 4 Subnet
- Page 68 and 69:
Embedded Web Server (Settings for E
- Page 70 and 71:
2 Enter the correct settings in eac
- Page 72 and 73:
Loading Paper in the Cassettes The
- Page 74 and 75:
2-29 Preparation before Use 6 Inser
- Page 76 and 77:
2-31 Preparation before Use 3 Adjus
- Page 78 and 79:
2-33 Preparation before Use 3 Adjus
- Page 80 and 81:
Paper stopper To use the sheet ejec
- Page 82 and 83:
*** To change to a media type other
- Page 84 and 85:
2-39 Preparation before Use When th
- Page 86 and 87:
Cassette 1 Type: a b **************
- Page 88 and 89:
MP Tray Size: a b *****************
- Page 90 and 91:
Loading Originals in the Document P
- Page 92 and 93:
Installing Printing System Driver 2
- Page 94 and 95:
Custom Mode 2-49 Preparation before
- Page 96 and 97:
2-51 Preparation before Use 7 Choos
- Page 98 and 99:
Setting TWAIN Driver Register this
- Page 100 and 101:
2-55 Preparation before Use 2 Selec
- Page 102 and 103:
3 Basic Operation This chapter expl
- Page 104 and 105:
One-Touch Keys and Program Keys The
- Page 106 and 107:
Changing and Deleting Settings Reca
- Page 108 and 109:
Copying Follow the steps as below f
- Page 110 and 111:
Adjusting Density Use this procedur
- Page 112 and 113:
Selecting Image Quality Select imag
- Page 114 and 115:
Zoom Copying 3-13 Basic Operation A
- Page 116 and 117:
Standard Zoom: a b ****************
- Page 118 and 119:
Two-sided to Two-sided Original Cop
- Page 120 and 121:
Scanning... Job No.: 9999 Page(s):
- Page 122 and 123:
3-21 Basic Operation 5 Press the OK
- Page 124 and 125:
3-23 Basic Operation 6 Select the B
- Page 126 and 127:
Sending 3-25 Basic Operation This m
- Page 128 and 129:
Ready to send. Dest.: 1 p :sally@of
- Page 130 and 131:
Host Name(SMB): A b Osaka SD* ABC [
- Page 132 and 133:
Dest. Confirm.: a b p Morgan@office
- Page 134 and 135:
3-33 Basic Operation 2 At the Comma
- Page 136 and 137:
3-35 Basic Operation In Windows XP,
- Page 138 and 139:
Checking the [Path] 3-37 Basic Oper
- Page 140 and 141:
Configuring Windows Firewall (for W
- Page 142 and 143:
3-41 Basic Operation 6 Select TCP,
- Page 144 and 145:
Confirm Destination Screen 3-43 Bas
- Page 146 and 147:
Destination Search Destinations reg
- Page 148 and 149:
Sending to Different Types of Desti
- Page 150 and 151:
Original Configurations Send Config
- Page 152 and 153:
Checking Remaining Toner and Paper
- Page 154 and 155:
4 Copying Functions This chapter ex
- Page 156 and 157:
Original Size: a b ****************
- Page 158 and 159:
Selecting the Multi Purpose Tray Ch
- Page 160 and 161:
4-7 10 Place paper in the multi pur
- Page 162 and 163:
Use the procedure below to select t
- Page 164 and 165:
Combine Mode 4-11 Copying Functions
- Page 166 and 167:
Function Menu: a b ****************
- Page 168 and 169:
Job Finish Notice 4-15 Copying Func
- Page 170 and 171:
File Name Entry 4-17 Copying Functi
- Page 172 and 173:
Color Selection 4-19 Copying Functi
- Page 174 and 175:
4-21 Copying Functions 10 Press the
- Page 176 and 177:
Background Density Lightens the bac
- Page 178 and 179:
Saturation Adjust the color saturat
- Page 180 and 181:
5 Sending Functions This chapter ex
- Page 182 and 183:
Original Size: a b ****************
- Page 184 and 185:
Function Menu: a b ****************
- Page 186 and 187:
Zoom: a b ********************* 1 *
- Page 188 and 189:
5-9 Sending Functions 6 Press the
- Page 190 and 191:
Orig.Orientation: a b 1 c Top Edge
- Page 192 and 193:
Function Menu: a b ****************
- Page 194 and 195:
Original Image Select image quality
- Page 196 and 197:
5-17 Sending Functions 6 Press the
- Page 198 and 199:
Color / Grayscale / Black and White
- Page 200 and 201:
File Name Entry 5-21 Sending Functi
- Page 202 and 203:
Sharpness 5-23 Sending Functions Ad
- Page 204 and 205:
5-25 Sending Functions 8 Press the
- Page 206 and 207:
Select Computer: a b **************
- Page 208 and 209:
Address Entry: A b ******@abcdefg.j
- Page 210 and 211:
Scanning Image using Application 5-
- Page 212 and 213:
6 Document Box This chapter explain
- Page 214 and 215:
JPEG/TIFF Print USB Memory: N Store
- Page 216 and 217:
Saving Documents to USB Memory (Sca
- Page 218 and 219:
Removing USB Memory Remove the USB
- Page 220 and 221:
l Fiala: a b *********************
- Page 222 and 223:
l Fiala: a b *********************
- Page 224 and 225:
7 Status / Job Cancel This chapter
- Page 226 and 227:
0009 Detail: C b Status: 1/9 Proces
- Page 228 and 229:
When complete job name not displaye
- Page 230 and 231:
When complete job name not displaye
- Page 232 and 233:
Print Job Log: a b 0006 maury’s d
- Page 234 and 235:
When complete job name not displaye
- Page 236 and 237:
Sending the Job Log History 7-13 St
- Page 238 and 239:
Registering Destination Dest. Confi
- Page 240 and 241:
Setting E-mail Subject Job Log Hist
- Page 242 and 243:
Device/Communication 7-19 Status /
- Page 244 and 245:
USB keyboard USB memory can be safe
- Page 246 and 247:
8 Default Setting (System Menu) Thi
- Page 248 and 249:
Switching the Language for Display
- Page 250 and 251:
Default Screen Select the screen ap
- Page 252 and 253:
Display Bright. Set the brightness
- Page 254 and 255:
Size Entry(Y): D b (1.97 - 8.50) x
- Page 256 and 257:
Adding a Custom Size and Media Type
- Page 258 and 259:
Paper Size and Media Type Setup for
- Page 260 and 261:
Paper Size and Media Type Setup for
- Page 262 and 263:
Paper Weight 8-17 Default Setting (
- Page 264 and 265:
Plain: a b ********************* 1
- Page 266 and 267:
Default Paper Source Select the def
- Page 268 and 269:
Special Paper Action 8-23 Default S
- Page 270 and 271:
Preset Limit Restrict the number of
- Page 272 and 273:
Error Handling 8-27 Default Setting
- Page 274 and 275:
Function Defaults 8-29 Default Sett
- Page 276 and 277:
Original Image Continuous Scan: a b
- Page 278 and 279:
Color Selection 8-33 Default Settin
- Page 280 and 281:
Copy: a b ********************* 1 *
- Page 282 and 283:
Density File Format: a b **********
- Page 284 and 285:
File Name Entry Zoom: a b *********
- Page 286 and 287:
Common Settings: a b **************
- Page 288 and 289:
EcoPrint 8-43 Default Setting (Syst
- Page 290 and 291:
XPS FitTo Page Function Default: a
- Page 292 and 293:
2 in 1 Layout File Separation: a b
- Page 294 and 295:
Common Settings: a b **************
- Page 296 and 297:
Orig. Binding Border Line: a b ****
- Page 298 and 299:
Finish Binding 8-53 Default Setting
- Page 300 and 301:
Color TIFF Comp. Detail Setting: a
- Page 302 and 303:
Common Settings: a b **************
- Page 304 and 305:
Optional Memory 8-59 Default Settin
- Page 306 and 307:
Restart. Are you sure? [ Yes ] [ No
- Page 308 and 309:
Paper Selection Photo Processing:a
- Page 310 and 311:
Auto % Priority AutoPaperSelect.:a
- Page 312 and 313:
8-67 Default Setting (System Menu)
- Page 314 and 315:
Select Key Set.: a b **************
- Page 316 and 317:
Use the procedure below to set Sele
- Page 318 and 319:
Check beforeSend:a b **************
- Page 320 and 321:
• Sharpness • Backgrnd Density
- Page 322 and 323:
Job Retention Deletion Quick Copy J
- Page 324 and 325:
Printer Settings 8-79 Default Setti
- Page 326 and 327:
When KPDL(Auto) Is Selected for Emu
- Page 328 and 329:
Override A4/LTR Printer: a b ******
- Page 330 and 331:
Copies Printer: a b ***************
- Page 332 and 333:
Orientation Set the default orienta
- Page 334 and 335:
Wide A4 8-89 Default Setting (Syste
- Page 336 and 337:
CR Action Printer: a b ************
- Page 338 and 339:
Paper Feed Mode Print Offset(V): D
- Page 340 and 341:
Printing Reports/Sending Notice 8-9
- Page 342 and 343:
8-97 Default Setting (System Menu)
- Page 344 and 345:
Send Result Report 8-99 Default Set
- Page 346 and 347:
Adjustment/Maintenance Adjust print
- Page 348 and 349:
AutoColorCorrect Manual: a b 3 -1 *
- Page 350 and 351:
8-105 Default Setting (System Menu)
- Page 352 and 353:
Detailed Settings Normal: a b *****
- Page 354 and 355:
Detail: a b ********************* 1
- Page 356 and 357:
Correct. Bk Line 8-111 Default Sett
- Page 358 and 359:
Service Setting: a b **************
- Page 360 and 361:
Service Setting: a b **************
- Page 362 and 363:
Date/Timer Date/Timer settings incl
- Page 364 and 365:
Date Format 8-119 Default Setting (
- Page 366 and 367:
Summer Time Time Zone: a b ********
- Page 368 and 369:
Error Clear Timer Sys. Menu/Count.:
- Page 370 and 371:
Sleep Timer 8-125 Default Setting (
- Page 372 and 373:
Login User Name: L b **************
- Page 374 and 375:
Panel Reset Timer Timer Setting: a
- Page 376 and 377:
Common Settings: a b **************
- Page 378 and 379:
Editing Destination (Address Book/A
- Page 380 and 381:
Entering E-mail Address Entering Fo
- Page 382 and 383:
Path: A b SD3\report* ABC [ Text ]
- Page 384 and 385:
Adding a Group 8-139 Default Settin
- Page 386 and 387:
Entering Group Member Detail: C b G
- Page 388 and 389:
Editing a Destination Detail: C b A
- Page 390 and 391:
Adding a Destination on One-touch K
- Page 392 and 393:
Overwrite. Are you sure? z No. 1 [
- Page 394 and 395:
Network Setup The following network
- Page 396 and 397:
NetWare Setup System: a b *********
- Page 398 and 399:
AppleTalk Setup 8-153 Ether-II 802.
- Page 400 and 401:
WSD Print Setup WSD-SCAN: a b *****
- Page 402 and 403:
Protocol Detail Make other network
- Page 404 and 405:
Network Setting: a b **************
- Page 406 and 407:
IPP Security Network Setting: a b *
- Page 408 and 409: Sys. Menu/Count.:a b 1 Report 2 Cou
- Page 410 and 411: SNMPv3 Setting Secure Protocol: a b
- Page 412 and 413: Rule Setting: a b *****************
- Page 414 and 415: USB Host: a b *********************
- Page 416 and 417: Optional interface (Optional interf
- Page 418 and 419: Security Level (Security Level sett
- Page 420 and 421: 9 Maintenance This chapter describe
- Page 422 and 423: Cleaning the paper transfer unit 9-
- Page 424 and 425: 9-5 Maintenance 4 Make sure the rel
- Page 426 and 427: New Waste Toner Box 9-7 4 Open the
- Page 428 and 429: 10 Troubleshooting This chapter exp
- Page 430 and 431: Symptom Checkpoints Corrective Acti
- Page 432 and 433: Symptom Checkpoints Corrective Acti
- Page 434 and 435: Symptom Checkpoints Corrective Acti
- Page 436 and 437: Error Message Checkpoints Correctiv
- Page 438 and 439: Error Message Checkpoints Correctiv
- Page 440 and 441: Error Message Checkpoints Correctiv
- Page 442 and 443: Error Message Checkpoints Correctiv
- Page 444 and 445: Online Help Messages 10-17 Troubles
- Page 446 and 447: Paper jam in the paper feeder 10-19
- Page 448 and 449: 10-21 Troubleshooting 2 Open the le
- Page 450 and 451: 11 Management This chapter explains
- Page 452 and 453: Sys. Menu/Count.:a b **************
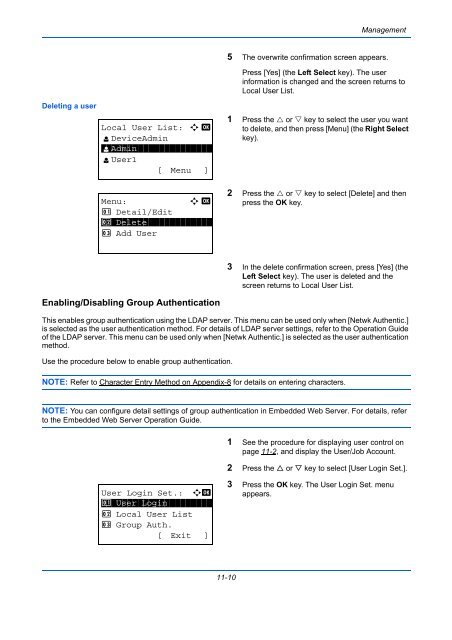
- Page 454 and 455: Login/Logout 11-5 Management Once y
- Page 456 and 457: User Login Set.: a b 1 User Login *
- Page 460 and 461: Group Auth.: a b ******************
- Page 462 and 463: Job Accounting 11-13 Management Job
- Page 464 and 465: Login/Logout If job accounting is e
- Page 466 and 467: Managing Accounts Menu: a b 1 Detai
- Page 468 and 469: Overwrite. Are you sure? z k Osaka
- Page 470 and 471: Restriction Items [Split] selected
- Page 472 and 473: Applying Limit of Restriction Limit
- Page 474 and 475: Default Counter Limit When you add
- Page 476 and 477: Counting the Number of Pages Printe
- Page 478 and 479: User/Job Account:a b 1 User Login S
- Page 480 and 481: Printing an Accounting Report Total
- Page 482 and 483: Checking the Counter You can check
- Page 484 and 485: Appendix • Optional Equipment....
- Page 486 and 487: Precautions for Handling the Memory
- Page 488 and 489: Optional Function You can use the o
- Page 490 and 491: System: a b ********************* 1
- Page 492 and 493: Selecting Type of Characters To ent
- Page 494 and 495: Characters associated with differen
- Page 496 and 497: Supported types Supported paper siz
- Page 498 and 499: Choosing the Appropriate Paper This
- Page 500 and 501: Curl: Most paper naturally tends to
- Page 502 and 503: Envelopes Envelopes should always b
- Page 504 and 505: Coated Paper Coated paper is create
- Page 506 and 507: Sharpness adjustment Adjust the sha
- Page 508 and 509:
Paper Capacity Cassette 1 250 sheet
- Page 510 and 511:
Scanner Item Description Operating
- Page 512 and 513:
Glossary AppleTalk AppleTalk, which
- Page 514 and 515:
NetWare Novell's network management
- Page 516 and 517:
Index Numerics 1-sided/2-sided Sele
- Page 518 and 519:
J Job Available Status 7-2 Cancelin
- Page 520 and 521:
Sending Size Selection 5-4 Setup 8-
- Page 525 and 526:
First edition 2011.4 2MAKMEN000