- Page 1 and 2:
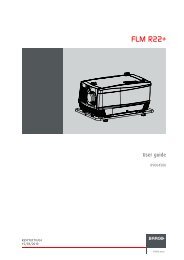
CLM HD8 User guide R9050130 R905013
- Page 3 and 4:
Changes Barco provides this manual
- Page 5 and 6:
Table of contents TABLE OF CONTENTS
- Page 7 and 8:
Table of contents 12.8 Internal pat
- Page 9 and 10:
1. Safety 1. SAFETY About this chap
- Page 11 and 12:
1. Safety • Mercury Vapor Warning
- Page 13 and 14:
1. Safety 1.4 Important warnings co
- Page 15 and 16:
2. General 2. GENERAL About this ch
- Page 17 and 18:
2. General Image 2-2 5. Remove the
- Page 19 and 20:
2. General Positioning the projecto
- Page 21 and 22:
2. General 2.5 Projector air inlets
- Page 23 and 24:
3. Physical installation 3. PHYSICA
- Page 25 and 26:
3. Physical installation 3.1.2 RCU
- Page 27 and 28:
3. Physical installation a b c d e
- Page 29 and 30:
3. Physical installation When this
- Page 31 and 32:
3. Physical installation Image 3-16
- Page 33 and 34:
3. Physical installation 3.5 Alignm
- Page 35 and 36:
4. Stacking CLM projectors 4. STACK
- Page 37 and 38:
4. Stacking CLM projectors D A B C
- Page 39 and 40:
5. Connections 5. CONNECTIONS About
- Page 41 and 42:
5. Connections max. 3 lamps on 4 la
- Page 43 and 44:
5. Connections 5.3 Communication co
- Page 45 and 46: 5. Connections RS232 An Electronic
- Page 47 and 48: 6. Getting started 6. GETTING START
- Page 49 and 50: 6. Getting started Ind. Key name De
- Page 51 and 52: 9 0 3 4 6. Getting started Switchin
- Page 53 and 54: 6. Getting started 3. When finished
- Page 55 and 56: 6. Getting started When no digit is
- Page 57 and 58: 6. Getting started Common Address E
- Page 59 and 60: 7. START UP OF THE ADJUSTMENT MODE
- Page 61 and 62: 7. Start up of the adjustment mode
- Page 63 and 64: 8. Input menu 8. INPUT MENU Overvie
- Page 65 and 66: 8. Input menu Input module Indicati
- Page 67 and 68: 8. Input menu Genlock off Genlock o
- Page 69 and 70: 8. Input menu When native resolutio
- Page 71 and 72: 8. Input menu The Input menu is dis
- Page 73 and 74: 9. Image menu 9. IMAGE MENU Overvie
- Page 75 and 76: 9. Image menu 9.3.1 Contrast About
- Page 77 and 78: 9. Image menu 9.3.4 Tint (hue) Abou
- Page 79 and 80: 9. Image menu Image 9-25 Image 9-24
- Page 81 and 82: 9. Image menu Image 9-35 9.3.8.2 Se
- Page 83 and 84: 9. Image menu One can conclude here
- Page 85 and 86: 9. Image menu The projected image s
- Page 87 and 88: 9. Image menu Use the or key to adj
- Page 89 and 90: 9. Image menu Image 9-68 Image 9-67
- Page 91 and 92: 9. Image menu Auto Off Detects for
- Page 93 and 94: 9. Image menu 9.6.2 Manual Load fil
- Page 95: 9. Image menu Image 9-92 Image 9-93
- Page 99 and 100: 10. Layout menu 10. LAYOUT MENU Ove
- Page 101 and 102: 10. Layout menu Image 10-7 Size adj
- Page 103 and 104: 10. Layout menu Image 10-16 [ ] = n
- Page 105 and 106: 10. Layout menu Image 10-24 Positio
- Page 107 and 108: 10. Layout menu Image 10-33 Size PI
- Page 109 and 110: 10. Layout menu A Save window opens
- Page 111 and 112: 10. Layout menu 10.4.2 Rename a lay
- Page 113 and 114: 10. Layout menu Image 10-63 Image 1
- Page 115 and 116: 11. Lamp menu 11. LAMP MENU Overvie
- Page 117 and 118: 11. Lamp menu Image 11-7 About over
- Page 119 and 120: 12. Alignment menu 12. ALIGNMENT ME
- Page 121 and 122: 12. Alignment menu For more informa
- Page 123 and 124: 12. Alignment menu 12.5 Blanking Wh
- Page 125 and 126: 12. Alignment menu 3. Use the ▲ o
- Page 127 and 128: 12. Alignment menu Image 12-31 When
- Page 129 and 130: 12. Alignment menu 12.11.2 Preparat
- Page 131 and 132: 12. Alignment menu Image 12-47 How
- Page 133 and 134: 12. Alignment menu How to set for t
- Page 135 and 136: 12. Alignment menu Image 12-68 Widt
- Page 137 and 138: 12. Alignment menu Image 12-74 Imag
- Page 139 and 140: 13. Projector control 13. PROJECTOR
- Page 141 and 142: 13. Projector control Image 13-4 13
- Page 143 and 144: 13. Projector control Image 13-14 I
- Page 145 and 146: 13. Projector control [ON] = DHCP i
- Page 147 and 148:
13. Projector control Image 13-31 I
- Page 149 and 150:
13. Projector control Image 13-41 1
- Page 151 and 152:
13. Projector control About channel
- Page 153 and 154:
13. Projector control The allocated
- Page 155 and 156:
13. Projector control 3. Use the
- Page 157 and 158:
14. Service menu 14. SERVICE MENU A
- Page 159 and 160:
14. Service menu 14.3 Diagnosis Wha
- Page 161 and 162:
14. Service menu 14.3.4 I²C diagno
- Page 163 and 164:
14. Service menu Image 14-27 Use th
- Page 165 and 166:
14. Service menu 2. Use the ▲ or
- Page 167 and 168:
14. Service menu When the projector
- Page 169 and 170:
14. Service menu 4. Use the ▲ or
- Page 171 and 172:
15. Maintenance 15. MAINTENANCE Abo
- Page 173 and 174:
16. Servicing 16. SERVICING About t
- Page 175 and 176:
16. Servicing A B C Image 16-2 Fron
- Page 177 and 178:
16. Servicing A Image 16-5 Slide ou
- Page 179 and 180:
16. Servicing Image 16-9 Take out t
- Page 181 and 182:
16. Servicing CAUTION: Ensure that
- Page 183 and 184:
16. Servicing 10.Close the main lid
- Page 185 and 186:
17. PROJECTOR COVERS, REMOVAL AND I
- Page 187 and 188:
17. Projector covers, removal and i
- Page 189 and 190:
17. Projector covers, removal and i
- Page 191 and 192:
17. Projector covers, removal and i
- Page 193 and 194:
17. Projector covers, removal and i
- Page 195 and 196:
A. Dimensions A. DIMENSIONS Overvie
- Page 197 and 198:
B. Standard Source Files B. STANDAR
- Page 199 and 200:
C. DMX Chart C. DMX CHART Overview
- Page 201 and 202:
C. DMX Chart Chan-Functionel Type R
- Page 203 and 204:
D. Specifications D. SPECIFICATIONS
- Page 205 and 206:
D. Specifications D.2 Specification
- Page 207 and 208:
D. Specifications D.4 Specification
- Page 209 and 210:
E. Troubleshooting E. TROUBLESHOOTI
- Page 211 and 212:
E. Troubleshooting Error code Descr
- Page 213 and 214:
E. Troubleshooting Error code Descr
- Page 215 and 216:
F. MOUNTING OPTIONAL CARRY HANDLE F
- Page 217 and 218:
F. Mounting optional Carry handle I
- Page 219 and 220:
F. Mounting optional Carry handle 1
- Page 221 and 222:
G. Order info G. ORDER INFO G.1 Spa
- Page 223 and 224:
Glossary GLOSSARY 2:2 pull-down The
- Page 225 and 226:
Index INDEX A Adjustment 48-50 Quic
- Page 227 and 228:
Index Identification 113 Lamp mode
- Page 229 and 230:
Index Source timings 83 Specificati
- Page 231:
Revision Sheet To: Barco nv Events/