ClientBase Overview Database Administrators
ClientBase Overview Database Administrators
ClientBase Overview Database Administrators

You also want an ePaper? Increase the reach of your titles
YUMPU automatically turns print PDFs into web optimized ePapers that Google loves.
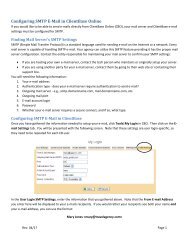
<strong>ClientBase</strong> <strong>Overview</strong> for <strong>Administrators</strong><br />
STEP TWO: Go to Merge|File Handoff.<br />
A wizard appears for you to identify what profiles to include, what address information to include and what<br />
Branch ID should be used for any profiles that do not have a Branch ID associated.<br />
Please note, the Branch ID is mandatory to ensure that each profile from your database is associated with your<br />
agency or branch identification, in case the file is consolidated into a larger database of other agency profiles.<br />
The Branch ID can be entered here or by going into the Utilities Menu, selecting Branch, using Modify to enter<br />
the Branch record, and then completing the Branch ID field, located to the right of the Pseudo City field.<br />
STEP THREE: Map Marketing Tables<br />
The file created by this process is hard-coded to include 7 Marketing Fields labeled with the field names of<br />
When, Where, With Whom, What Type, What Interest, What Budget and Client Status.<br />
Map the marketing tables in your database to the appropriate marketing field in the file by clicking on the down<br />
arrow next to each marketing field, and selecting from your drop down list of marketing tables. If your agency<br />
does not maintain a marketing category for any of the 7 hard coded marketing fields, then simply leave that field<br />
blank.<br />
STEP FOUR:<br />
Select Delivery Method<br />
Select the delivery method of either E-Mail (MAPI or SMTP) or Save to Disk. If either MAPI or SMTP E-Mail is selected<br />
then an E-Mail message will appear and the ASCII file will be automatically attached.<br />
STEP FIVE:<br />
Click Finish to Complete the Export<br />
Review a summary of the options selected so far in Steps 1 to 4. Use the Previous button to go back and make any changes.<br />
Click Mailer to create a mailer record for those profiles included in the file. Click Finish to create the file and complete the<br />
handoff.<br />
Quick Steps to Export File<br />
File Export: This is the most robust export option in <strong>ClientBase</strong>. The File Export menu item<br />
provides the capability to export even more <strong>ClientBase</strong> data into files. This exported data can<br />
be used in web site design or for loading into other software programs.<br />
STEP ONE: Query the profiles you want to use with File Export.<br />
Use the Level 1, 2 or 3 Query to query your database for just those profiles you would like included in the ASCII<br />
file created by this feature. Use also the Edit Menu or right mouse click in Results Screen to "Invert All", "Select<br />
All" or "Unselect All" in your Results Screen.<br />
STEP TWO: Go to File|Export.<br />
File Name: Start the Export File process by naming the new file and selecting the created file's location. By<br />
clicking on the selection box directly to the right of the File Name field, a dialog box appears to make your<br />
selections.<br />
ASCII File Type: Select Comma or Tab Delimiters.<br />
Include Field Names: Check this box to include field names (also known as headers) in your Export File.<br />
Export Clean Address Data Only: Check here if you do not want incomplete addresses to be included in<br />
export file.<br />
No Sorting: Check here to create a file that is not sorted to lessen compilation time.<br />
Include Records: To determine which profile records are included in the export file, select Current Results in<br />
Profile Manager, Selected Results in Profile Manager or Requery Profile Manager.<br />
47