

OPERATOR'S MANUAL - The Baker Company Blog
OPERATOR'S MANUAL - The Baker Company Blog
OPERATOR'S MANUAL - The Baker Company Blog

You also want an ePaper? Increase the reach of your titles
YUMPU automatically turns print PDFs into web optimized ePapers that Google loves.
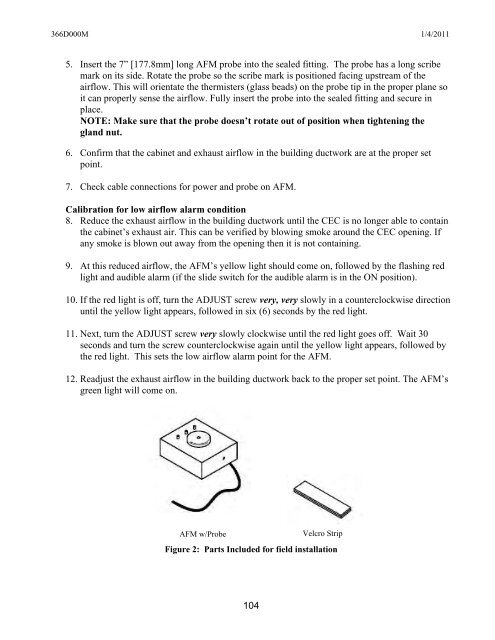
366D000M 1/4/20115. Insert the 7” [177.8mm] long AFM probe into the sealed fitting. <strong>The</strong> probe has a long scribemark on its side. Rotate the probe so the scribe mark is positioned facing upstream of theairflow. This will orientate the thermisters (glass beads) on the probe tip in the proper plane soit can properly sense the airflow. Fully insert the probe into the sealed fitting and secure inplace.NOTE: Make sure that the probe doesn’t rotate out of position when tightening thegland nut.6. Confirm that the cabinet and exhaust airflow in the building ductwork are at the proper setpoint.7. Check cable connections for power and probe on AFM.Calibration for low airflow alarm condition8. Reduce the exhaust airflow in the building ductwork until the CEC is no longer able to containthe cabinet’s exhaust air. This can be verified by blowing smoke around the CEC opening. Ifany smoke is blown out away from the opening then it is not containing.9. At this reduced airflow, the AFM’s yellow light should come on, followed by the flashing redlight and audible alarm (if the slide switch for the audible alarm is in the ON position).10. If the red light is off, turn the ADJUST screw very, very slowly in a counterclockwise directionuntil the yellow light appears, followed in six (6) seconds by the red light.11. Next, turn the ADJUST screw very slowly clockwise until the red light goes off. Wait 30seconds and turn the screw counterclockwise again until the yellow light appears, followed bythe red light. This sets the low airflow alarm point for the AFM.12. Readjust the exhaust airflow in the building ductwork back to the proper set point. <strong>The</strong> AFM’sgreen light will come on.AFM w/ProbeVelcro StripFigure 2: Parts Included for field installation104


