Thermo Scientific Orion 2110XP Ammonia Analyzer
Thermo Scientific Orion 2110XP Ammonia Analyzer
Thermo Scientific Orion 2110XP Ammonia Analyzer

Create successful ePaper yourself
Turn your PDF publications into a flip-book with our unique Google optimized e-Paper software.
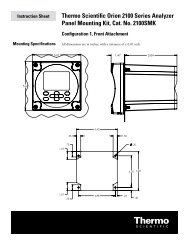
<strong>Analyzer</strong> MaintenanceReplacement of theReagent and DiffusionTubing AssemblyWarning: The reagent is hazardous. Use protective glasses and gloves. Referto the bottle label for precautions and work in a well-ventilated area.Note: Turn off the air pump before beginning this procedure; otherwise,the air pump will splatter the reagent outward as the bottle is removed.1. Remove the thumbnut and slide the bottle adaptor from the flow cell.2. Unscrew the cap and lift the bottle adaptor from the reagent bottle.3. Remove both ends of the old diffusion tubing from the reagent bottleadaptor nipples. Properly dispose of spent reagent and tubing.4. Fit the ends of the new diffusion tubing over the bottle adaptor nipples.5. In a hood or outdoors, carefully remove the cap from a new reagentbottle.6. Make sure that the large O-ring is between the reagent bottle and bottleadaptor. Slide the diffusion tubing loops into the reagent bottle andscrew the bottle adaptor onto the new reagent bottle.7. Ensure that the three small O-rings are in place on the flow cell.8. Reattach the bottle adaptor/reagent bottle assembly to the flow cellby sliding it onto the screw and tightening the thumbnut. The bottleadaptor can be rotated to allow correct positioning on the analyzer.Figure V-1Reagent Bottle AssemblyReagent Bottle CapFlow Cell Assembly FaceSmall O-ringsThumbnutReagent Bottle AdapterReagent Bottle NippleLarge O-ringReagentDiffusion Tube<strong>Thermo</strong> <strong>Scientific</strong> <strong>Orion</strong> <strong>2110XP</strong> <strong>Ammonia</strong> <strong>Analyzer</strong> User GuideV-4