XNX Universal Transmitter - Merkantile
XNX Universal Transmitter - Merkantile
XNX Universal Transmitter - Merkantile

Create successful ePaper yourself
Turn your PDF publications into a flip-book with our unique Google optimized e-Paper software.
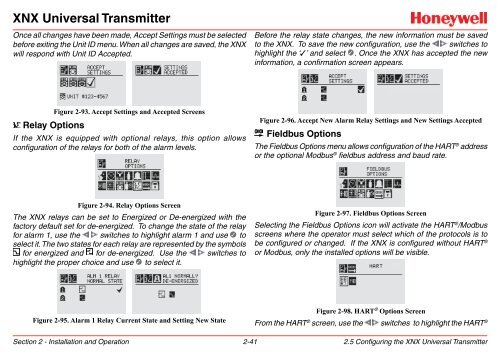
<strong>XNX</strong> <strong>Universal</strong> <strong>Transmitter</strong>Once all changes have been made, Accept Settings must be selectedbefore exiting the Unit ID menu. When all changes are saved, the <strong>XNX</strong>will respond with Unit ID Accepted.Before the relay state changes, the new information must be savedto the <strong>XNX</strong>. To save the new configuration, use the switches tohighlight the ‘3’ and select . Once the <strong>XNX</strong> has accepted the newinformation, a confirmation screen appears.Relay OptionsFigure 2-93. Accept Settings and Accepted ScreensIf the <strong>XNX</strong> is equipped with optional relays, this option allowsconfiguration of the relays for both of the alarm levels.Figure 2-96. Accept New Alarm Relay Settings and New Settings AcceptedFieldbus OptionsThe Fieldbus Options menu allows configuration of the HART ® addressor the optional Modbus ® fieldbus address and baud rate.Figure 2-94. Relay Options ScreenThe <strong>XNX</strong> relays can be set to Energized or De-energized with thefactory default set for de-energized. To change the state of the relayfor alarm 1, use the switches to highlight alarm 1 and use toselect it. The two states for each relay are represented by the symbolsfor energized and for de-energized. Use the switches tohighlight the proper choice and use to select it.Figure 2-97. Fieldbus Options ScreenSelecting the Fieldbus Options icon will activate the HART ® /Modbusscreens where the operator must select which of the protocols is tobe configured or changed. If the <strong>XNX</strong> is configured without HART ®or Modbus, only the installed options will be visible.Figure 2-95. Alarm 1 Relay Current State and Setting New StateFigure 2-98. HART ® Options ScreenFrom the HART ® screen, use the switches to highlight the HART ®Section 2 - Installation and Operation 2-412.5 Configuring the <strong>XNX</strong> <strong>Universal</strong> <strong>Transmitter</strong>