WSCAD51 Getting Started - FTP Directory Listing
WSCAD51 Getting Started - FTP Directory Listing
WSCAD51 Getting Started - FTP Directory Listing

Create successful ePaper yourself
Turn your PDF publications into a flip-book with our unique Google optimized e-Paper software.
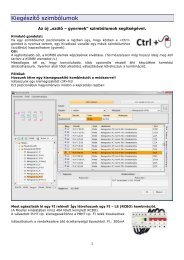
Automatic functions<br />
Note the format of the terminal number: '5/1' means that 1 of 5 terminals in the<br />
terminal strip '–X0' has been placed in the layout diagram.<br />
Turn the 'Automatically' on again and click on the '+' sign. You will get the dialog<br />
'Place several parts'. In this dialog you can enter the number of terminals to be placed.<br />
Select the number '4' and the terminals will be positioned automatically one by one after<br />
confirming the position with the left mouse button. In order to move straight on to the<br />
terminal strip '-X1' or '–X2' after '-X0', the first terminal must always be placed<br />
individually. Double click on the entry '-X1' in the Control cabinet manager. The first<br />
terminal of '-X1' will be added to '-X0'. As you can see, the reference name is also<br />
displayed. The remaining terminals can now be placed with the '+' sign. Remember to<br />
select '7' in the dialog 'Place several parts'. Repeat the procedure for terminal strip '–<br />
X2'. The mounting plate assembly is now complete.<br />
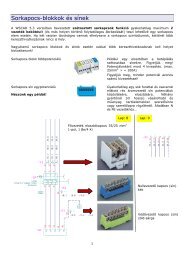
Putting symbols on control cabinet door<br />
Components on the doors are not attached to a top hat rail. Turn 'Automatically' off.<br />
Select '-P1' and position it at 425,0/675,0 mm. Now place the remaining components<br />
on the following co-ordinates:<br />
95