Microtek ScanWizard Pro User's Guide
Microtek ScanWizard Pro User's Guide
Microtek ScanWizard Pro User's Guide

Create successful ePaper yourself
Turn your PDF publications into a flip-book with our unique Google optimized e-Paper software.
English<br />
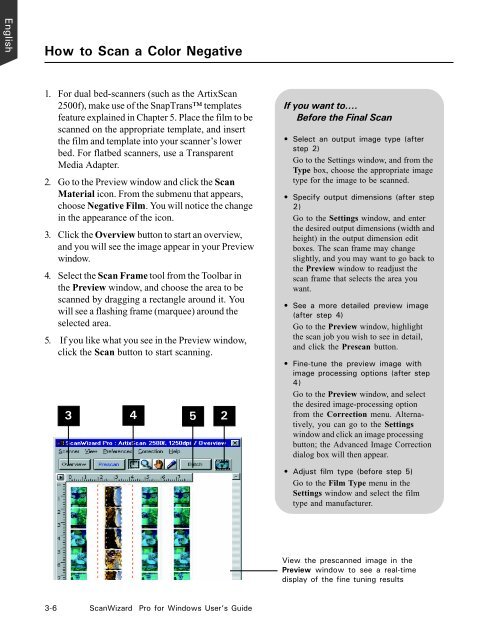
How to Scan a Color Negative<br />
1. For dual bed-scanners (such as the ArtixScan<br />
2500f), make use of the SnapTrans templates<br />
feature explained in Chapter 5. Place the film to be<br />
scanned on the appropriate template, and insert<br />
the film and template into your scanner’s lower<br />
bed. For flatbed scanners, use a Transparent<br />
Media Adapter.<br />
2. Go to the Preview window and click the Scan<br />
Material icon. From the submenu that appears,<br />
choose Negative Film. You will notice the change<br />
in the appearance of the icon.<br />
3. Click the Overview button to start an overview,<br />
and you will see the image appear in your Preview<br />
window.<br />
4. Select the Scan Frame tool from the Toolbar in<br />
the Preview window, and choose the area to be<br />
scanned by dragging a rectangle around it. You<br />
will see a flashing frame (marquee) around the<br />
selected area.<br />
5. If you like what you see in the Preview window,<br />
click the Scan button to start scanning.<br />
3<br />
4<br />
3-6 <strong>ScanWizard</strong> <strong>Pro</strong> for Windows User’s <strong>Guide</strong><br />
5<br />
2<br />
If you want to....<br />
Before the Final Scan<br />
• Select an output image type (after<br />
step 2)<br />
Go to the Settings window, and from the<br />
Type box, choose the appropriate image<br />
type for the image to be scanned.<br />
• Specify output dimensions (after step<br />
2)<br />
Go to the Settings window, and enter<br />
the desired output dimensions (width and<br />
height) in the output dimension edit<br />
boxes. The scan frame may change<br />
slightly, and you may want to go back to<br />
the Preview window to readjust the<br />
scan frame that selects the area you<br />
want.<br />
• See a more detailed preview image<br />
(after step 4)<br />
Go to the Preview window, highlight<br />
the scan job you wish to see in detail,<br />
and click the Prescan button.<br />
• Fine-tune the preview image with<br />
image processing options (after step<br />
4)<br />
Go to the Preview window, and select<br />
the desired image-processing option<br />
from the Correction menu. Alternatively,<br />
you can go to the Settings<br />
window and click an image processing<br />
button; the Advanced Image Correction<br />
dialog box will then appear.<br />
• Adjust film type (before step 5)<br />
Go to the Film Type menu in the<br />
Settings window and select the film<br />
type and manufacturer.<br />
View the prescanned image in the<br />
Preview window to see a real-time<br />
display of the fine tuning results