Microtek ScanWizard Pro User's Guide
Microtek ScanWizard Pro User's Guide
Microtek ScanWizard Pro User's Guide

Create successful ePaper yourself
Turn your PDF publications into a flip-book with our unique Google optimized e-Paper software.
English<br />
Using the Gradation Tool (LCH Mode only)<br />
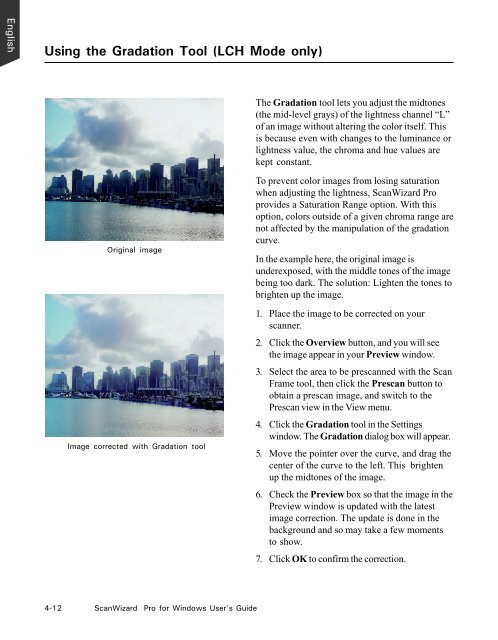
Original image<br />
Image corrected with Gradation tool<br />
4-12 <strong>ScanWizard</strong> <strong>Pro</strong> for Windows User’s <strong>Guide</strong><br />
The Gradation tool lets you adjust the midtones<br />
(the mid-level grays) of the lightness channel “L”<br />
of an image without altering the color itself. This<br />
is because even with changes to the luminance or<br />
lightness value, the chroma and hue values are<br />
kept constant.<br />
To prevent color images from losing saturation<br />
when adjusting the lightness, <strong>ScanWizard</strong> <strong>Pro</strong><br />
provides a Saturation Range option. With this<br />
option, colors outside of a given chroma range are<br />
not affected by the manipulation of the gradation<br />
curve.<br />
In the example here, the original image is<br />
underexposed, with the middle tones of the image<br />
being too dark. The solution: Lighten the tones to<br />
brighten up the image.<br />
1. Place the image to be corrected on your<br />
scanner.<br />
2. Click the Overview button, and you will see<br />
the image appear in your Preview window.<br />
3. Select the area to be prescanned with the Scan<br />
Frame tool, then click the Prescan button to<br />
obtain a prescan image, and switch to the<br />
Prescan view in the View menu.<br />
4. Click the Gradation tool in the Settings<br />
window. The Gradation dialog box will appear.<br />
5. Move the pointer over the curve, and drag the<br />
center of the curve to the left. This brighten<br />
up the midtones of the image.<br />
6. Check the Preview box so that the image in the<br />
Preview window is updated with the latest<br />
image correction. The update is done in the<br />
background and so may take a few moments<br />
to show.<br />
7. Click OK to confirm the correction.