Microtek ScanWizard Pro User's Guide
Microtek ScanWizard Pro User's Guide
Microtek ScanWizard Pro User's Guide

Create successful ePaper yourself
Turn your PDF publications into a flip-book with our unique Google optimized e-Paper software.
English<br />
Using the Selective Color Tool (LCH Mode Only)<br />
The Selective Color tool is used to perform color<br />
correction to a specific color range without altering<br />
the other colors in an image. This is done either to<br />
increase the visual impact of a color or to completely<br />
change the relationship of the targeted color(s) to the<br />
other colors in the image.<br />
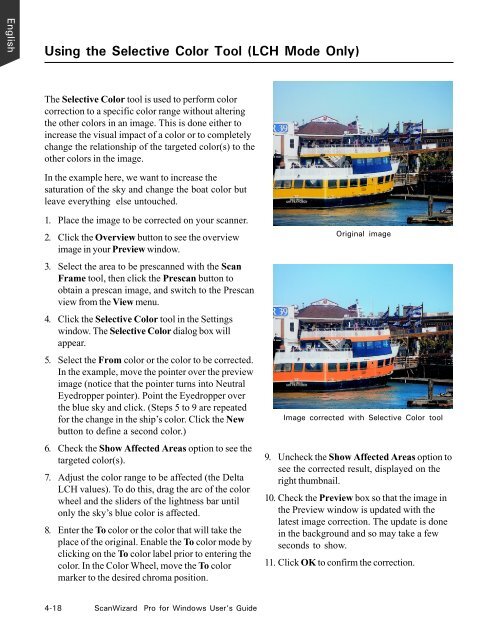
In the example here, we want to increase the<br />
saturation of the sky and change the boat color but<br />
leave everything else untouched.<br />
1. Place the image to be corrected on your scanner.<br />
2. Click the Overview button to see the overview<br />
image in your Preview window.<br />
3. Select the area to be prescanned with the Scan<br />
Frame tool, then click the Prescan button to<br />
obtain a prescan image, and switch to the Prescan<br />
view from the View menu.<br />
4. Click the Selective Color tool in the Settings<br />
window. The Selective Color dialog box will<br />
appear.<br />
5. Select the From color or the color to be corrected.<br />
In the example, move the pointer over the preview<br />
image (notice that the pointer turns into Neutral<br />
Eyedropper pointer). Point the Eyedropper over<br />
the blue sky and click. (Steps 5 to 9 are repeated<br />
for the change in the ship’s color. Click the New<br />
button to define a second color.)<br />
6. Check the Show Affected Areas option to see the<br />
targeted color(s).<br />
7. Adjust the color range to be affected (the Delta<br />
LCH values). To do this, drag the arc of the color<br />
wheel and the sliders of the lightness bar until<br />
only the sky’s blue color is affected.<br />
8. Enter the To color or the color that will take the<br />
place of the original. Enable the To color mode by<br />
clicking on the To color label prior to entering the<br />
color. In the Color Wheel, move the To color<br />
marker to the desired chroma position.<br />
4-18 <strong>ScanWizard</strong> <strong>Pro</strong> for Windows User’s <strong>Guide</strong><br />
Original image<br />
Image corrected with Selective Color tool<br />
9. Uncheck the Show Affected Areas option to<br />
see the corrected result, displayed on the<br />
right thumbnail.<br />
10. Check the Preview box so that the image in<br />
the Preview window is updated with the<br />
latest image correction. The update is done<br />
in the background and so may take a few<br />
seconds to show.<br />
11. Click OK to confirm the correction.