Microtek ScanWizard Pro User's Guide
Microtek ScanWizard Pro User's Guide
Microtek ScanWizard Pro User's Guide

Create successful ePaper yourself
Turn your PDF publications into a flip-book with our unique Google optimized e-Paper software.
English<br />
Using the Dynamic Range Tool<br />
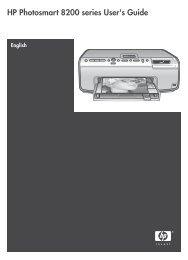
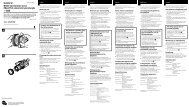
Original image and<br />
lightness histogram<br />
without density<br />
correction, showing<br />
narrow tonal range<br />
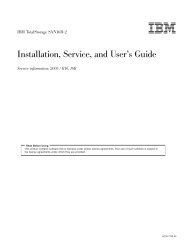
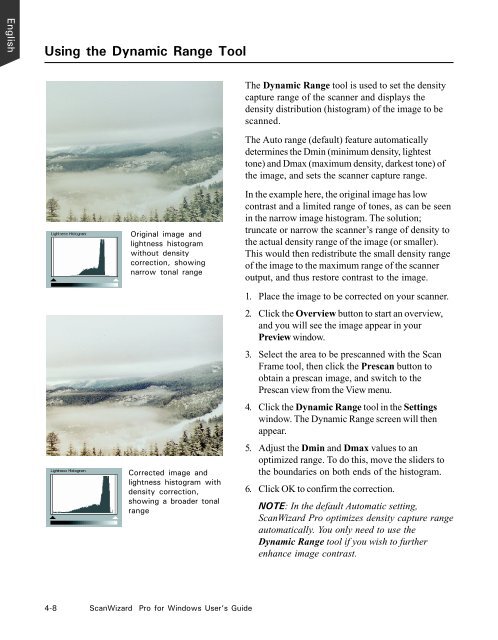
Corrected image and<br />
lightness histogram with<br />
density correction,<br />
showing a broader tonal<br />
range<br />
4-8 <strong>ScanWizard</strong> <strong>Pro</strong> for Windows User’s <strong>Guide</strong><br />
The Dynamic Range tool is used to set the density<br />
capture range of the scanner and displays the<br />
density distribution (histogram) of the image to be<br />
scanned.<br />
The Auto range (default) feature automatically<br />
determines the Dmin (minimum density, lightest<br />
tone) and Dmax (maximum density, darkest tone) of<br />
the image, and sets the scanner capture range.<br />
In the example here, the original image has low<br />
contrast and a limited range of tones, as can be seen<br />
in the narrow image histogram. The solution;<br />
truncate or narrow the scanner’s range of density to<br />
the actual density range of the image (or smaller).<br />
This would then redistribute the small density range<br />
of the image to the maximum range of the scanner<br />
output, and thus restore contrast to the image.<br />
1. Place the image to be corrected on your scanner.<br />
2. Click the Overview button to start an overview,<br />
and you will see the image appear in your<br />
Preview window.<br />
3. Select the area to be prescanned with the Scan<br />
Frame tool, then click the Prescan button to<br />
obtain a prescan image, and switch to the<br />
Prescan view from the View menu.<br />
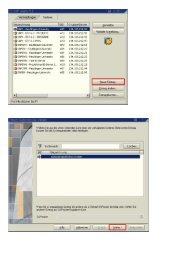
4. Click the Dynamic Range tool in the Settings<br />
window. The Dynamic Range screen will then<br />
appear.<br />
5. Adjust the Dmin and Dmax values to an<br />
optimized range. To do this, move the sliders to<br />
the boundaries on both ends of the histogram.<br />
6. Click OK to confirm the correction.<br />
NOTE: In the default Automatic setting,<br />
<strong>ScanWizard</strong> <strong>Pro</strong> optimizes density capture range<br />
automatically. You only need to use the<br />
Dynamic Range tool if you wish to further<br />
enhance image contrast.