Operating instructions - EWM Hightec Welding GmbH
Operating instructions - EWM Hightec Welding GmbH
Operating instructions - EWM Hightec Welding GmbH

You also want an ePaper? Increase the reach of your titles
YUMPU automatically turns print PDFs into web optimized ePapers that Google loves.
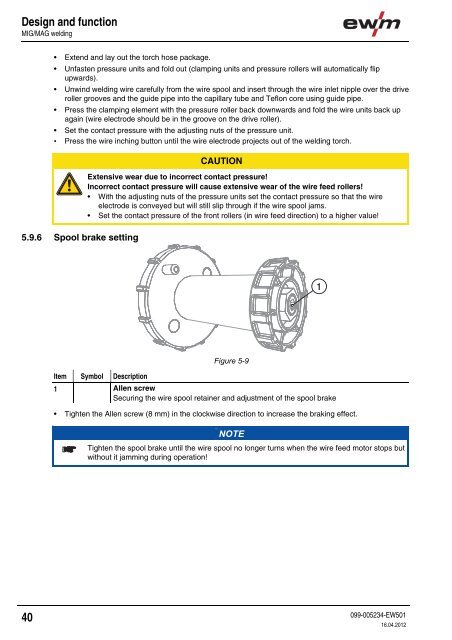
Design and functionMIG/MAG welding• Extend and lay out the torch hose package.• Unfasten pressure units and fold out (clamping units and pressure rollers will automatically flipupwards).• Unwind welding wire carefully from the wire spool and insert through the wire inlet nipple over the driveroller grooves and the guide pipe into the capillary tube and Teflon core using guide pipe.• Press the clamping element with the pressure roller back downwards and fold the wire units back upagain (wire electrode should be in the groove on the drive roller).• Set the contact pressure with the adjusting nuts of the pressure unit.• Press the wire inching button until the wire electrode projects out of the welding torch.CAUTIONExtensive wear due to incorrect contact pressure!Incorrect contact pressure will cause extensive wear of the wire feed rollers!• With the adjusting nuts of the pressure units set the contact pressure so that the wireelectrode is conveyed but will still slip through if the wire spool jams.• Set the contact pressure of the front rollers (in wire feed direction) to a higher value!5.9.6 Spool brake setting1Figure 5-9Item Symbol Description 01 Allen screwSecuring the wire spool retainer and adjustment of the spool brake• Tighten the Allen screw (8 mm) in the clockwise direction to increase the braking effect.NOTETighten the spool brake until the wire spool no longer turns when the wire feed motor stops butwithout it jamming during operation!40099-005234-EW50116.04.2012