Operating instructions - EWM Hightec Welding GmbH
Operating instructions - EWM Hightec Welding GmbH
Operating instructions - EWM Hightec Welding GmbH

Create successful ePaper yourself
Turn your PDF publications into a flip-book with our unique Google optimized e-Paper software.
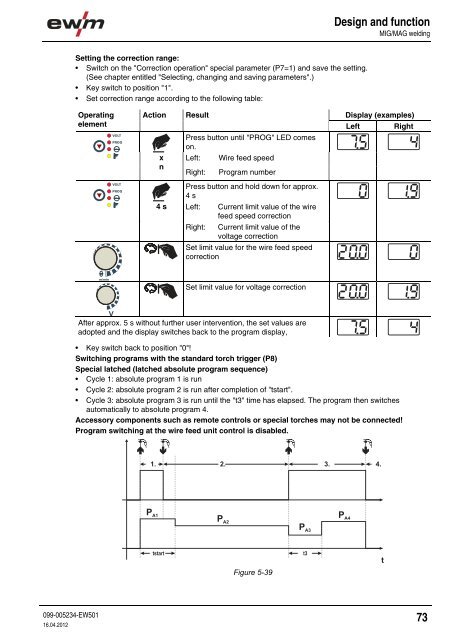
Design and functionMIG/MAG weldingSetting the correction range:• Switch on the "Correction operation" special parameter (P7=1) and save the setting.(See chapter entitled "Selecting, changing and saving parameters".)• Key switch to position "1".• Set correction range according to the following table:<strong>Operating</strong>elementActionResultDisplay (examples)Left RightVOLTPROGPress button until "PROG" LED comeson.xnLeft:Right:Wire feed speedProgram numberVOLTPROGPress button and hold down for approx.4 s4 sLeft:Current limit value of the wirefeed speed correctionRight:Current limit value of thevoltage correctionSet limit value for the wire feed speedcorrectionm/minSet limit value for voltage correctionAfter approx. 5 s without further user intervention, the set values areadopted and the display switches back to the program display,• Key switch back to position "0"!Switching programs with the standard torch trigger (P8)Special latched (latched absolute program sequence)• Cycle 1: absolute program 1 is run• Cycle 2: absolute program 2 is run after completion of "tstart".• Cycle 3: absolute program 3 is run until the "t3" time has elapsed. The program then switchesautomatically to absolute program 4.Accessory components such as remote controls or special torches may not be connected!Program switching at the wire feed unit control is disabled.Figure 5-39099-005234-EW50116.04.201273