Operating instructions - EWM Hightec Welding GmbH
Operating instructions - EWM Hightec Welding GmbH
Operating instructions - EWM Hightec Welding GmbH

Create successful ePaper yourself
Turn your PDF publications into a flip-book with our unique Google optimized e-Paper software.
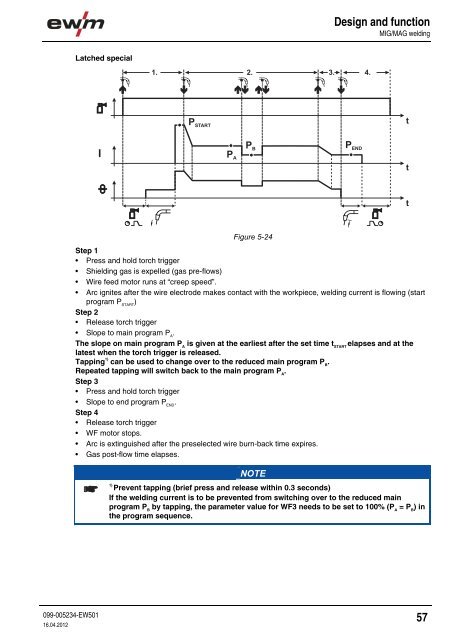
Design and functionMIG/MAG weldingLatched special1. 2. 3. 4.P STARTFigure 5-24tIP AP BP ENDttStep 1• Press and hold torch trigger• Shielding gas is expelled (gas pre-flows)• Wire feed motor runs at “creep speed”.• Arc ignites after the wire electrode makes contact with the workpiece, welding current is flowing (startprogram P START)Step 2• Release torch trigger• Slope to main program P A.The slope on main program P Ais given at the earliest after the set time t STARTelapses and at thelatest when the torch trigger is released.Tapping 1) can be used to change over to the reduced main program P B.Repeated tapping will switch back to the main program P A.Step 3• Press and hold torch trigger• Slope to end program P END.Step 4• Release torch trigger• WF motor stops.• Arc is extinguished after the preselected wire burn-back time expires.• Gas post-flow time elapses.NOTE1)Prevent tapping (brief press and release within 0.3 seconds)If the welding current is to be prevented from switching over to the reduced mainprogram P Bby tapping, the parameter value for WF3 needs to be set to 100% (P A= P B) inthe program sequence.099-005234-EW50116.04.201257