Operating instructions - EWM Hightec Welding GmbH
Operating instructions - EWM Hightec Welding GmbH
Operating instructions - EWM Hightec Welding GmbH

You also want an ePaper? Increase the reach of your titles
YUMPU automatically turns print PDFs into web optimized ePapers that Google loves.
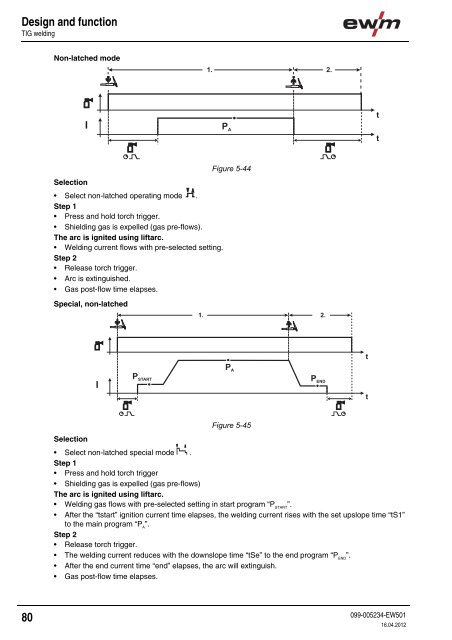
Design and functionTIG weldingNon-latched mode1. 2.IP AttFigure 5-44Selection• Select non-latched operating mode .Step 1• Press and hold torch trigger.• Shielding gas is expelled (gas pre-flows).The arc is ignited using liftarc.• <strong>Welding</strong> current flows with pre-selected setting.Step 2• Release torch trigger.• Arc is extinguished.• Gas post-flow time elapses.Special, non-latched1. 2.tP AP STARTFigure 5-45IP ENDtSelection• Select non-latched special mode .Step 1• Press and hold torch trigger• Shielding gas is expelled (gas pre-flows)The arc is ignited using liftarc.• <strong>Welding</strong> gas flows with pre-selected setting in start program “P START”.• After the “tstart” ignition current time elapses, the welding current rises with the set upslope time “tS1”to the main program “P A”.Step 2• Release torch trigger.• The welding current reduces with the downslope time “tSe” to the end program “P END”.• After the end current time “end” elapses, the arc will extinguish.• Gas post-flow time elapses.80099-005234-EW50116.04.2012