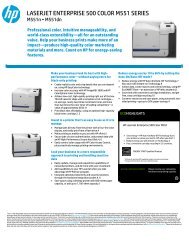
Click to Download User Manual. - Home
Click to Download User Manual. - Home
Click to Download User Manual. - Home
- No tags were found...

Create successful ePaper yourself
Turn your PDF publications into a flip-book with our unique Google optimized e-Paper software.
Roller misfeedMessage Location of jam Go <strong>to</strong>1 Open the scanner lid.2 Grasp the misfed paper, and remove the paper from the feed areaby carefully pulling it <strong>to</strong> the right using both hands.Duplex Jam 0,Duplex Jam 1,Duplex Jam 2In the duplex unit Page 11.6Finisher Jam 0 In the stacker unit Page 11.7Finisher Jam 1,Finisher DuplexJamIn the stacker unit Page 11.71Finisher Jam 2 In the stacker unit Page 11.8CautionTo avoid tearing the paper, pull the jammed paper out gentlyand slowly. Follow the instructions in the following sections <strong>to</strong>clear the jam.In the tray 11 scanner lid1 Pull out the paper tray <strong>to</strong> open. After you pull it out completely, liftthe front part of the tray up slightly <strong>to</strong> release the tray from themachine.3 Close the scanner lid. Then load the removed pages back in<strong>to</strong> theDADF.Clearing paper jamsWhen a paper jam occurs, the warming message appears on the displayscreen. Refer <strong>to</strong> the table below <strong>to</strong> locate and clear the paper jam.Message Location of jam Go <strong>to</strong>Feed Jam at Tray 1,Feed Jam at Tray 2,Feed Jam at Tray 3,Feed Jam at Tray 4,Feed Jam at MPTrayCheck Tray 2 FeedArea,Check Tray 3 FeedArea,Check Tray 4 FeedAreaJam at FuserIn the paper feed area (tray 1,optional tray, or multi-purposetray)In the paper feed area(optional tray)In the fuser area or aroundthe <strong>to</strong>ner cartridgebelow andpage 11.5Page 11.3Page 11.5Registration Jam In the paper exit area Page 11.611.2