GA-K8VM800M / GA-K8VM800M-RH - visit site - Gigabyte
GA-K8VM800M / GA-K8VM800M-RH - visit site - Gigabyte
GA-K8VM800M / GA-K8VM800M-RH - visit site - Gigabyte

You also want an ePaper? Increase the reach of your titles
YUMPU automatically turns print PDFs into web optimized ePapers that Google loves.
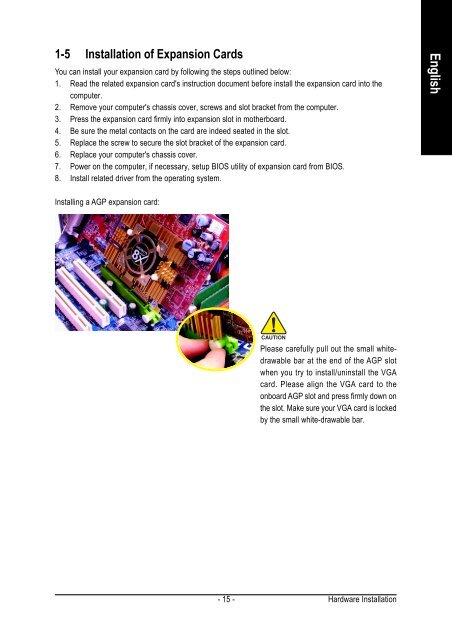
1-5 Installation of Expansion Cards<br />
You can install your expansion card by following the steps outlined below:<br />
1. Read the related expansion card's instruction document before install the expansion card into the<br />
computer.<br />
2. Remove your computer's chassis cover, screws and slot bracket from the computer.<br />
3. Press the expansion card firmly into expansion slot in motherboard.<br />
4. Be sure the metal contacts on the card are indeed seated in the slot.<br />
5. Replace the screw to secure the slot bracket of the expansion card.<br />
6. Replace your computer's chassis cover.<br />
7. Power on the computer, if necessary, setup BIOS utility of expansion card from BIOS.<br />
8. Install related driver from the operating system.<br />
Installing a AGP expansion card:<br />
- 15 -<br />
Please carefully pull out the small whitedrawable<br />
bar at the end of the AGP slot<br />
when you try to install/uninstall the V<strong>GA</strong><br />
card. Please align the V<strong>GA</strong> card to the<br />
onboard AGP slot and press firmly down on<br />
the slot. Make sure your V<strong>GA</strong> card is locked<br />
by the small white-drawable bar.<br />
Hardware Installation<br />
English