GA-K8VM800M / GA-K8VM800M-RH - visit site - Gigabyte
GA-K8VM800M / GA-K8VM800M-RH - visit site - Gigabyte
GA-K8VM800M / GA-K8VM800M-RH - visit site - Gigabyte

You also want an ePaper? Increase the reach of your titles
YUMPU automatically turns print PDFs into web optimized ePapers that Google loves.
Chapter 3Drivers Installation<br />
Pictures below are shown in Windows XP.<br />
Insert the driver CD-title that came with your motherboard into your CD-ROM drive, the driver<br />
CD-title will auto start and show the installation guide. If not, please double click the CD-ROM<br />
device icon in "My computer", and execute the Setup.exe.<br />
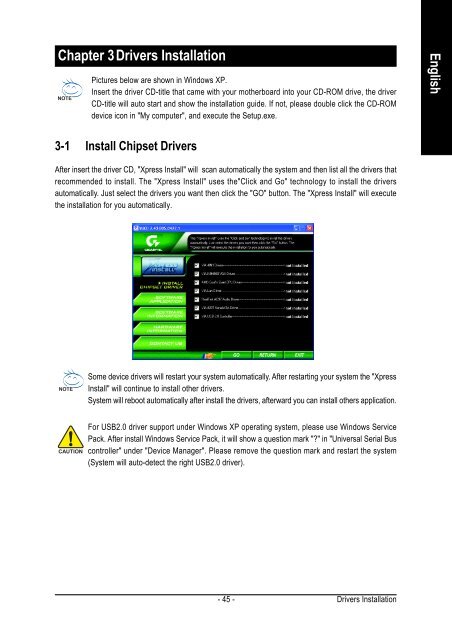
3-1 Install Chipset Drivers<br />
After insert the driver CD, "Xpress Install" will scan automatically the system and then list all the drivers that<br />
recommended to install. The "Xpress Install" uses the"Click and Go" technology to install the drivers<br />
automatically. Just select the drivers you want then click the "GO" button. The "Xpress Install" will execute<br />
the installation for you automatically.<br />
Some device drivers will restart your system automatically. After restarting your system the "Xpress<br />
Install" will continue to install other drivers.<br />
System will reboot automatically after install the drivers, afterward you can install others application.<br />
For USB2.0 driver support under Windows XP operating system, please use Windows Service<br />
Pack. After install Windows Service Pack, it will show a question mark "?" in "Universal Serial Bus<br />
controller" under "Device Manager". Please remove the question mark and restart the system<br />
(System will auto-detect the right USB2.0 driver).<br />
- 45 -<br />
Drivers Installation<br />
English