40-5091-24B IFU PAC-PACII.indd - Smiths Medical
40-5091-24B IFU PAC-PACII.indd - Smiths Medical
40-5091-24B IFU PAC-PACII.indd - Smiths Medical
You also want an ePaper? Increase the reach of your titles
YUMPU automatically turns print PDFs into web optimized ePapers that Google loves.
English (continued)<br />
8<br />
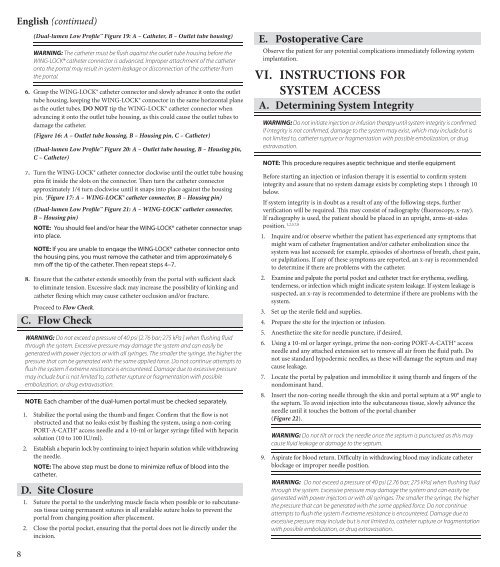
(Dual-lumen Low Profi le Figure 19: A – Catheter, B – Outlet tube housing)<br />
WARNING: The catheter must be fl ush against the outlet tube housing before the<br />
WING-LOCK® catheter connector is advanced. Improper attachment of the catheter<br />
onto the portal may result in system leakage or disconnection of the catheter from<br />
the portal.<br />
6. Grasp the WING-LOCK® catheter connector and slowly advance it onto the outlet<br />
tube housing, keeping the WING-LOCK® connector in the same horizontal plane<br />
as the outlet tubes. DO NOT tip the WING-LOCK® catheter connector when<br />
advancing it onto the outlet tube housing, as this could cause the outlet tubes to<br />
damage the catheter.<br />
(Figure 16: A – Outlet tube housing, B – Housing pin, C – Catheter)<br />
(Dual-lumen Low Profi le Figure 20: A – Outlet tube housing, B – Housing pin,<br />
C – Catheter)<br />
7. Turn the WING-LOCK® catheter connector clockwise until the outlet tube housing<br />
pins fi t inside the slots on the connector. Th en turn the catheter connector<br />
approximately 1/4 turn clockwise until it snaps into place against the housing<br />
pin. (Figure 17: A – WING-LOCK® catheter connector, B – Housing pin)<br />
(Dual-lumen Low Profi le Figure 21: A – WING-LOCK® catheter connector,<br />
B – Housing pin)<br />
NOTE: You should feel and/or hear the WING-LOCK® catheter connector snap<br />
into place.<br />
NOTE: If you are unable to engage the WING-LOCK® catheter connector onto<br />
the housing pins, you must remove the catheter and trim approximately 6<br />
mm off the tip of the catheter. Then repeat steps 4–7.<br />
8. Ensure that the catheter extends smoothly from the portal with suffi cient slack<br />
to eliminate tension. Excessive slack may increase the possibility of kinking and<br />
catheter fl exing which may cause catheter occlusion and/or fracture.<br />
Proceed to Flow Check.<br />
C. Flow Check<br />
WARNING: Do not exceed a pressure of <strong>40</strong> psi [2.76 bar; 275 kPa ] when fl ushing fl uid<br />
through the system. Excessive pressure may damage the system and can easily be<br />
generated with power injectors or with all syringes. The smaller the syringe, the higher the<br />
pressure that can be generated with the same applied force. Do not continue attempts to<br />
fl ush the system if extreme resistance is encountered. Damage due to excessive pressure<br />
may include but is not limited to, catheter rupture or fragmentation with possible<br />
em bolization, or drug extravasation.<br />
NOTE: Each chamber of the dual-lumen portal must be checked separately.<br />
1. Stabilize the portal using the thumb and fi nger. Con fi rm that the fl ow is not<br />
obstructed and that no leaks exist by fl ushing the system, using a non-coring<br />
PORT-A-CATH® access needle and a 10-ml or larger syringe fi lled with heparin<br />
solution (10 to 100 IU/ml).<br />
2. Establish a heparin lock by continuing to inject heparin solution while withdrawing<br />
the needle.<br />
NOTE: The above step must be done to minimize refl ux of blood into the<br />
catheter.<br />
D. Site Closure<br />
1. Suture the portal to the underlying muscle fascia when possible or to subcutaneous<br />
tissue using permanent sutures in all available suture holes to prevent the<br />
portal from changing position aft er placement.<br />
2. Close the portal pocket, ensuring that the portal does not lie directly under the<br />
incision.<br />
E. Postoperative Care<br />
Observe the patient for any potential complications immedi ately fol lowing system<br />
implantation.<br />
VI. INSTRUCTIONS FOR<br />
SYSTEM ACCESS<br />
A. Determining System Integrity<br />
WARNING: Do not initiate injection or infusion therapy until system integrity is confi rmed.<br />
If integrity is not confi rmed, damage to the system may exist, which may include but is<br />
not limited to, catheter rupture or fragmentation with possible em bolization, or drug<br />
extravasation.<br />
NOTE: This procedure requires aseptic technique and sterile equipment.<br />
Before starting an injection or infusion therapy it is essential to confi rm system<br />
integrity and assure that no system damage exists by completing steps 1 through 10<br />
below.<br />
If system integrity is in doubt as a result of any of the following steps, further<br />
verifi cation will be required. Th is may consist of radiography (fl uoroscopy, x-ray).<br />
If radiography is used, the patient should be placed in an upright, arms-at-sides<br />
position. 1,2,5,7,8<br />
1. Inquire and/or observe whether the patient has experienced any symptoms that<br />
might warn of catheter fragmentation and/or catheter embolization since the<br />
system was last accessed; for example, episodes of shortness of breath, chest pain,<br />
or palpitations. If any of these symptoms are reported, an x-ray is recommended<br />
to determine if there are problems with the catheter.<br />
2. Examine and palpate the portal pocket and catheter tract for erythema, swelling,<br />
tenderness, or infection which might indicate system leakage. If system leakage is<br />
suspected, an x-ray is recommended to determine if there are problems with the<br />
system.<br />
3. Set up the sterile fi eld and supplies.<br />
4. Prepare the site for the injection or infusion.<br />
5. Anesthetize the site for needle puncture, if desired.<br />
6. Using a 10-ml or larger syringe, prime the non-coring PORT-A-CATH® access<br />
needle and any attached extension set to remove all air from the fl uid path. Do<br />
not use standard hypodermic needles, as these will damage the septum and may<br />
cause leakage.<br />
7. Locate the portal by palpation and immobilize it using thumb and fi ngers of the<br />
nondominant hand.<br />
8. Insert the non-coring needle through the skin and portal septum at a 90° angle to<br />
the septum. To avoid injection into the subcutaneous tissue, slowly advance the<br />
needle until it touches the bottom of the portal chamber<br />
(Figure 22).<br />
WARNING: Do not tilt or rock the needle once the septum is punctured as this may<br />
cause fl uid leakage or damage to the septum.<br />
9. Aspirate for blood return. Diffi culty in withdrawing blood may indicate catheter<br />
blockage or improper needle position.<br />
WARNING: Do not exceed a pressure of <strong>40</strong> psi [2.76 bar; 275 kPa] when fl ushing fl uid<br />
through the system. Excessive pressure may damage the system and can easily be<br />
generated with power injectors or with all syringes. The smaller the syringe, the higher<br />
the pressure that can be generated with the same applied force. Do not continue<br />
attempts to fl ush the system if extreme resistance is encountered. Damage due to<br />
excessive pressure may include but is not limited to, catheter rupture or fragmentation<br />
with possible em bolization, or drug extravasation.


