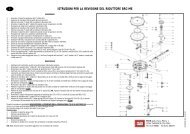
manuale per l'installatore - 1/3 tipologie d'installazione - 2/3 software ...
manuale per l'installatore - 1/3 tipologie d'installazione - 2/3 software ...
manuale per l'installatore - 1/3 tipologie d'installazione - 2/3 software ...

You also want an ePaper? Increase the reach of your titles
YUMPU automatically turns print PDFs into web optimized ePapers that Google loves.
If the automatic procedure took<br />
a known rpm signal (it usually happens)<br />
you just need to click on<br />
Confirm to continue (picture 4.13).<br />
At this point it is better to verify<br />
rpm are correctly read and this<br />
control could be made, for example,<br />
at idle and at 3000 rpm.<br />
If everything is correct, click on<br />
NEXT, and positively answer to the<br />
confirmation question; then continue<br />
the Aided Procedure.<br />
4.2.1.5 TPS Calibration<br />
This is the fourth step for LPG<br />
installations and the fifth one for<br />
CNG (see picture 4.1).<br />
Entering the screen for the TPS<br />
calibration, the procedure automatically<br />
begins (picture 4.15).<br />
First of all it is necessary to verify<br />
the o<strong>per</strong>ation conditions (the ones<br />
written in blue at the top of the<br />
screen). The vehicle has to be<br />
stopped with the engine running<br />
on petrol.<br />
At the beginning the engine has<br />
to be on with the accelerator completely<br />
released. After the program<br />
will indicate to execute three complete<br />
and uniform accelerations.<br />
It the TPS calibration has not<br />
been correctly executed it is possible<br />
to modify it by clicking on<br />
Change Calibration key as indicated<br />
in picture 4.15.<br />
At the end, click on Next, confirm<br />
the acquisitions and continue<br />
the Aided Procedure.<br />
Pic. 4.13 - Aided Procedure Guided Procedure – automatic rpm calibration<br />
Pic. 4.14 - Aided Procedure – TPS calibration<br />
Pic. 4.15 - Aided Procedure – TPS calibration ended<br />
21