THE PHOTOGRAPHIC EYE
THE PHOTOGRAPHIC EYE
THE PHOTOGRAPHIC EYE

Create successful ePaper yourself
Turn your PDF publications into a flip-book with our unique Google optimized e-Paper software.
chapter 9 Light<br />
ou don't really have much<br />
control over the compositional<br />
elements we've discussed<br />
so far: line, texture and shape.<br />
For the most part, they're just "out<br />
there" in the world, waiting for you<br />
to notice them. You can change their<br />
positions within the frame of your<br />
viewfinder, by moving forward or<br />
back, or to one side or the other. You<br />
can make one element more dominant<br />
than the others, and you can edit<br />
out distractions. Outside of that,<br />
however, you don't generally have<br />
any real control over them.<br />
The next three elements (light, motion<br />
and perspective) are more "interactive"—they<br />
allow (and may require)<br />
more choice on your part.<br />
They are, of course, also "out there"<br />
waiting for you, just like line, texture<br />
and shape. But there's an important<br />
difference.<br />
You can choose whether to accept<br />
the light that's "given" to you —or you<br />
can change it. You can, if you<br />
choose, make daylight look like midnight,<br />
and vice versa. More subtly,<br />
you can choose whether an object<br />
that's in shadow will simply be darker<br />
than its surroundings or utterly invisible.<br />
In fact, you have to choose.<br />
Following the recommendation of<br />
your light meter is a choice, especially<br />
since you must decide what source of<br />
light the meter is reading.<br />
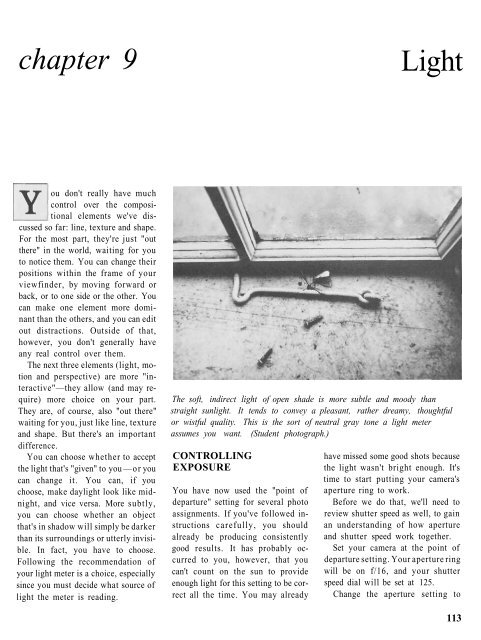
The soft, indirect light of open shade is more subtle and moody than<br />
straight sunlight. It tends to convey a pleasant, rather dreamy, thoughtful<br />
or wistful quality. This is the sort of neutral gray tone a light meter<br />
assumes you want. (Student photograph.)<br />
CONTROLLING<br />
EXPOSURE<br />
You have now used the "point of<br />
departure" setting for several photo<br />
assignments. If you've followed instructions<br />
carefully, you should<br />
already be producing consistently<br />
good results. It has probably occurred<br />
to you, however, that you<br />
can't count on the sun to provide<br />
enough light for this setting to be correct<br />
all the time. You may already<br />
have missed some good shots because<br />
the light wasn't bright enough. It's<br />
time to start putting your camera's<br />
aperture ring to work.<br />
Before we do that, we'll need to<br />
review shutter speed as well, to gain<br />
an understanding of how aperture<br />
and shutter speed work together.<br />
Set your camera at the point of<br />
departure setting. Your aperture ring<br />
will be on f/16, and your shutter<br />
speed dial will be set at 125.<br />
Change the aperture setting to<br />
113