THE PHOTOGRAPHIC EYE
THE PHOTOGRAPHIC EYE
THE PHOTOGRAPHIC EYE

Create successful ePaper yourself
Turn your PDF publications into a flip-book with our unique Google optimized e-Paper software.
crystals that received no light will not<br />
be affected. Those that received a little<br />
light will become increasingly dark<br />
as the developing continues, producing<br />
a lighter print. If the developing<br />
goes on too long, the result will be a<br />
print in which the contrast will be extremely<br />
high and everything will look<br />
overexposed.<br />
Shortening the developing time will<br />
reduce contrast, since even the<br />
crystals that received the most light<br />
will only have time to become gray.<br />
Stop Bath: Since virtually all<br />
developers only work well in an<br />
alkaline (non-acidic) solution, the<br />
developing process will be halted if<br />
the solution becomes acidic. That's<br />
precisely what stop bath does.<br />
Stop bath is simply diluted acetic<br />
acid. When the film, with developer<br />
on its surface, is immersed in the stop<br />
bath, this acid halts the development<br />
process. If you were to rinse off the<br />
stop bath and place the film back in<br />
the developer, the development process<br />
would continue.<br />
Indicator stop bath also contains<br />
a dye that turns purple when the acid<br />
is no longer active enough to be useful.<br />
If you are using an indicator stop<br />
bath, you can safely recycle it until<br />
the dye begins to change color (to a<br />
brownish gray). Most photographers,<br />
however, simply discard it after each<br />
use when processing film. (The indicator<br />
dye is more helpful when<br />
you're processing prints.)<br />
Fixer: "Fixing" film does two<br />
things: It dissolves all the silver<br />
crystals that have not been activated<br />
by the developer, and it hardens the<br />
emulsion. In essence, -it "locks" the<br />
image.<br />
There are two basic kinds of fixer:<br />
the regular variety (sodium thiosulphate)<br />
and "rapid fixer" (aluminum<br />
thiosulphate), which simply reacts<br />
228 The Photographic Eye<br />
more quickly. The key differences<br />
between the two is speed and, of<br />
course, price.<br />
Wash: Film must be thoroughly<br />
washed. Chemical traces left on the<br />
film by improper washing will interfere<br />
with the quality of your prints<br />
and may damage the negative as well.<br />
The quality of the water you use is<br />
also important. Most water that is<br />
safe to drink should be fine for<br />
washing films (as well as for diluting<br />
chemicals and washing prints).<br />
If, however, you repeatedly<br />
discover streaks, smears, speckles or<br />
other curiosities on the film's surface,<br />
try washing a few rolls in bottled or<br />
distilled water. If the curiosities go<br />
away, then your tap water is probably<br />
the problem. It's likely to be fine for<br />
diluting chemicals and may be okay<br />
for washing prints, but keep a bottle<br />
of "good" water on hand for washing<br />
film.<br />
Wetting Agent: A final step that<br />
is highly recommended, but not<br />
strictly essential, is coating the film<br />
with a wetting agent. The wetting<br />
agent covers the film with a slippery<br />
surface, so any impurities in the<br />
water will tend to slide off rather than<br />
stick. If you don't use a wetting<br />
agent, there's always a risk that<br />
something (mineral deposits, dust in<br />
the air, or even just bubbles in the<br />
water) will leave a permanent mark<br />
on the emulsion.<br />
• Interval Timer<br />
An interval timer is a device that<br />
measures the time between the beginning<br />
of a process and its end. Any<br />
timer (such as a clock, wristwatch or<br />
stopwatch) with a second-hand will<br />
do fine. There are of course a variety<br />
of very nice timers specifically designed<br />
for darkroom use ... but you<br />
don't need one.<br />
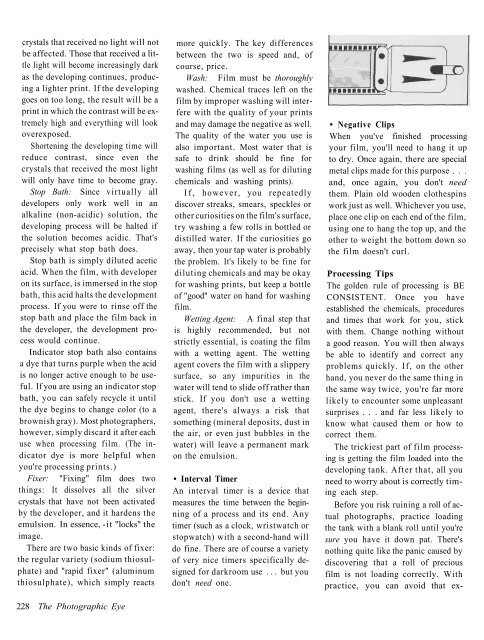
• Negative Clips<br />
When you've finished processing<br />
your film, you'll need to hang it up<br />
to dry. Once again, there are special<br />
metal clips made for this purpose . . .<br />
and, once again, you don't need<br />
them. Plain old wooden clothespins<br />
work just as well. Whichever you use,<br />
place one clip on each end of the film,<br />
using one to hang the top up, and the<br />
other to weight the bottom down so<br />
the film doesn't curl.<br />
Processing Tips<br />
The golden rule of processing is BE<br />
CONSISTENT. Once you have<br />
established the chemicals, procedures<br />
and times that work for you, stick<br />
with them. Change nothing without<br />
a good reason. You will then always<br />
be able to identify and correct any<br />
problems quickly. If, on the other<br />
hand, you never do the same thing in<br />
the same way twice, you're far more<br />
likely to encounter some unpleasant<br />
surprises . . . and far less likely to<br />
know what caused them or how to<br />
correct them.<br />
The trickiest part of film processing<br />
is getting the film loaded into the<br />
developing tank. After that, all you<br />
need to worry about is correctly timing<br />
each step.<br />
Before you risk ruining a roll of actual<br />
photographs, practice loading<br />
the tank with a blank roll until you're<br />
sure you have it down pat. There's<br />
nothing quite like the panic caused by<br />
discovering that a roll of precious<br />
film is not loading correctly. With<br />
practice, you can avoid that ex-