THE PHOTOGRAPHIC EYE
THE PHOTOGRAPHIC EYE
THE PHOTOGRAPHIC EYE
Create successful ePaper yourself
Turn your PDF publications into a flip-book with our unique Google optimized e-Paper software.
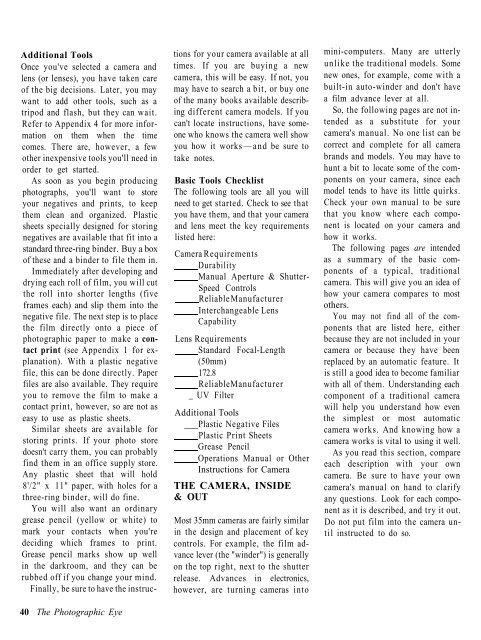
Additional Tools<br />
Once you've selected a camera and<br />
lens (or lenses), you have taken care<br />
of the big decisions. Later, you may<br />
want to add other tools, such as a<br />
tripod and flash, but they can wait.<br />
Refer to Appendix 4 for more information<br />
on them when the time<br />
comes. There are, however, a few<br />
other inexpensive tools you'll need in<br />
order to get started.<br />
As soon as you begin producing<br />
photographs, you'll want to store<br />
your negatives and prints, to keep<br />
them clean and organized. Plastic<br />
sheets specially designed for storing<br />
negatives are available that fit into a<br />
standard three-ring binder. Buy a box<br />
of these and a binder to file them in.<br />
Immediately after developing and<br />
drying each roll of film, you will cut<br />
the roll into shorter lengths (five<br />
frames each) and slip them into the<br />
negative file. The next step is to place<br />
the film directly onto a piece of<br />
photographic paper to make a contact<br />
print (see Appendix 1 for explanation).<br />
With a plastic negative<br />
file, this can be done directly. Paper<br />
files are also available. They require<br />
you to remove the film to make a<br />
contact print, however, so are not as<br />
easy to use as plastic sheets.<br />
Similar sheets are available for<br />
storing prints. If your photo store<br />
doesn't carry them, you can probably<br />
find them in an office supply store.<br />
Any plastic sheet that will hold<br />
8'/2" x 11" paper, with holes for a<br />
three-ring binder, will do fine.<br />
You will also want an ordinary<br />
grease pencil (yellow or white) to<br />
mark your contacts when you're<br />
deciding which frames to print.<br />
Grease pencil marks show up well<br />
in the darkroom, and they can be<br />
rubbed off if you change your mind.<br />
Finally, be sure to have the instruc-<br />
40 The Photographic Eye<br />
tions for your camera available at all<br />
times. If you are buying a new<br />
camera, this will be easy. If not, you<br />
may have to search a bit, or buy one<br />
of the many books available describing<br />
different camera models. If you<br />
can't locate instructions, have someone<br />
who knows the camera well show<br />
you how it works —and be sure to<br />
take notes.<br />
Basic Tools Checklist<br />
The following tools are all you will<br />
need to get started. Check to see that<br />
you have them, and that your camera<br />
and lens meet the key requirements<br />
listed here:<br />
Camera Requirements<br />
Durability<br />
Manual Aperture & Shutter-<br />
Speed Controls<br />
Reliable Manufacturer<br />
Interchangeable Lens<br />
Capability<br />
Lens Requirements<br />
Standard Focal-Length<br />
(50mm)<br />
172.8<br />
Reliable Manufacturer<br />
_ UV Filter<br />
Additional Tools<br />
Plastic Negative Files<br />
Plastic Print Sheets<br />
Grease Pencil<br />
Operations Manual or Other<br />
Instructions for Camera<br />
<strong>THE</strong> CAMERA, INSIDE<br />
& OUT<br />
Most 35mm cameras are fairly similar<br />
in the design and placement of key<br />
controls. For example, the film advance<br />
lever (the "winder") is generally<br />
on the top right, next to the shutter<br />
release. Advances in electronics,<br />
however, are turning cameras into<br />
mini-computers. Many are utterly<br />
unlike the traditional models. Some<br />
new ones, for example, come with a<br />
built-in auto-winder and don't have<br />
a film advance lever at all.<br />
So, the following pages are not intended<br />
as a substitute for your<br />
camera's manual. No one list can be<br />
correct and complete for all camera<br />
brands and models. You may have to<br />
hunt a bit to locate some of the components<br />
on your camera, since each<br />
model tends to have its little quirks.<br />
Check your own manual to be sure<br />
that you know where each component<br />
is located on your camera and<br />
how it works.<br />
The following pages are intended<br />
as a summary of the basic components<br />
of a typical, traditional<br />
camera. This will give you an idea of<br />
how your camera compares to most<br />
others.<br />
You may not find all of the components<br />
that are listed here, either<br />
because they are not included in your<br />
camera or because they have been<br />
replaced by an automatic feature. It<br />
is still a good idea to become familiar<br />
with all of them. Understanding each<br />
component of a traditional camera<br />
will help you understand how even<br />
the simplest or most automatic<br />
camera works. And knowing how a<br />
camera works is vital to using it well.<br />
As you read this section, compare<br />
each description with your own<br />
camera. Be sure to have your own<br />
camera's manual on hand to clarify<br />
any questions. Look for each component<br />
as it is described, and try it out.<br />
Do not put film into the camera until<br />
instructed to do so.


