THE PHOTOGRAPHIC EYE
THE PHOTOGRAPHIC EYE
THE PHOTOGRAPHIC EYE

You also want an ePaper? Increase the reach of your titles
YUMPU automatically turns print PDFs into web optimized ePapers that Google loves.
FOCAL POINT: Composition Tips<br />
As you continue to practice photography<br />
and begin discovering your<br />
own style, you'll also begin defining<br />
your own approach to composition.<br />
The guidelines that follow will,<br />
however, help you get off to a good<br />
start. If you pay close attention to<br />
these guidelines, many of the photographs<br />
you produce now will look<br />
pretty good even after you become a<br />
master photographer.<br />
Get in close. The most common<br />
mistake made by beginning photographers<br />
is staying too far away from<br />
the subject. Admittedly, a distant<br />
shot can sometimes be very effective.<br />
As a general rule, however, the closer<br />
you are to your subject, the more interesting<br />
your photograph will be.<br />
Why? Well, first of all, the larger<br />
the subject is within the frame, the<br />
more detail it will have. Detail tends<br />
to add interest. Making your primary<br />
subject large also helps the viewer<br />
understand that it is the primary subject.<br />
(It's very frustrating to "wander<br />
around" in a photograph trying to<br />
figure out what the photographer<br />
wanted you to look at first.) Finally,<br />
getting in close reduces the size of the<br />
negative space, making it more<br />
interesting.<br />
A good way to practice this tip is<br />
to shoot a subject several times, moving<br />
in closer with each shot. See how<br />
close you can get and still produce an<br />
understandable image. You may be<br />
surprised.<br />
Pay attention to negative space.<br />
Keeping negative space relatively<br />
small is half the battle, but not all of<br />
it. In addition, it's important to experiment<br />
with the placement of your<br />
subjects until you achieve an effect<br />
that is not merely interesting, but<br />
58 The Photographic Eye<br />
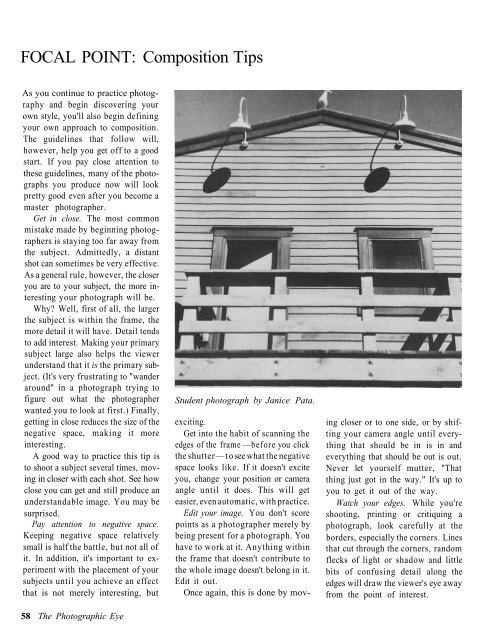
Student photograph by Janice Pata.<br />
exciting.<br />
Get into the habit of scanning the<br />
edges of the frame —before you click<br />
the shutter —to see what the negative<br />
space looks like. If it doesn't excite<br />
you, change your position or camera<br />
angle until it does. This will get<br />
easier, even automatic, with practice.<br />
Edit your image. You don't score<br />
points as a photographer merely by<br />
being present for a photograph. You<br />
have to work at it. Anything within<br />
the frame that doesn't contribute to<br />
the whole image doesn't belong in it.<br />
Edit it out.<br />
Once again, this is done by mov-<br />
ing closer or to one side, or by shifting<br />
your camera angle until everything<br />
that should be in is in and<br />
everything that should be out is out.<br />
Never let yourself mutter, "That<br />
thing just got in the way." It's up to<br />
you to get it out of the way.<br />
Watch your edges. While you're<br />
shooting, printing or critiquing a<br />
photograph, look carefully at the<br />
borders, especially the corners. Lines<br />
that cut through the corners, random<br />
flecks of light or shadow and little<br />
bits of confusing detail along the<br />
edges will draw the viewer's eye away<br />
from the point of interest.