QuarkXPress to Adobe InDesign CS4 Conversion Guide
QuarkXPress to Adobe InDesign CS4 Conversion Guide
QuarkXPress to Adobe InDesign CS4 Conversion Guide

Create successful ePaper yourself
Turn your PDF publications into a flip-book with our unique Google optimized e-Paper software.
To apply a stroke <strong>to</strong> any selected<br />
object(s) or text, ensure that the<br />
Stroke icon is selected instead. Note<br />
that you can apply a color, tint, or<br />
gradient <strong>to</strong> the fill or stroke of text<br />
characters without converting the<br />
text <strong>to</strong> outlines. (If you do choose<br />
Type > Create Outlines, the resulting<br />
text is no longer editable.)<br />
If you have one or more text frames<br />
selected with the Selection <strong>to</strong>ol, you<br />
can apply a fill or stroke <strong>to</strong> the text<br />
within each frame by first clicking<br />
the Formatting Affects Text icon in<br />
the Tools panel, the Swatches panel,<br />
or the Color panel. If you select the<br />
Formatting Affects Container icon<br />
instead, the fill or stroke is applied<br />
<strong>to</strong> the selected frame rather than <strong>to</strong><br />
the text.<br />
The Default Fill And Stroke icon<br />
in the Tools panel lets you return the<br />
Fill and Stroke icons <strong>to</strong> their default<br />
settings. The Swap Fill And Stroke<br />
icon reverses the colors of the<br />
stroke and fill icons.<br />
Selecting Images vs. Frames<br />
In <strong>QuarkXPress</strong>, you must select the<br />
Content <strong>to</strong>ol before you can modify<br />
either text or a graphic. <strong>InDesign</strong><br />
doesn’t have a single <strong>to</strong>ol for modifying<br />
both text and graphics. Instead, if<br />
you want <strong>to</strong> modify a graphic without<br />
affecting its frame, choose the<br />
Position <strong>to</strong>ol or the Direct Selection<br />
<strong>to</strong>ol, and then click the graphic.<br />
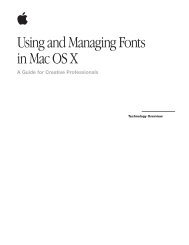
The Fill and Stroke icons (circled above)<br />
appear, partially overlapping each other,<br />
at the bot<strong>to</strong>m of the Tools panel and the<br />
<strong>to</strong>p of the Swatches panel.<br />
For example—if you want <strong>to</strong> move an<br />
image in<strong>to</strong> another frame—select it<br />
with the Direct Selection <strong>to</strong>ol, choose<br />
Edit > Cut, select the destination<br />
frame, and choose Edit > Paste In<strong>to</strong>.<br />
Similarly, you can change the color<br />
of imported black-and-white and<br />
grayscale graphics (but not of color<br />
graphics) by first selecting the<br />
graphic with the Direct Selection<br />
or Position <strong>to</strong>ol, and then clicking<br />
a color in the Swatches panel.<br />
Which <strong>to</strong>ol you use when scaling or<br />
resizing a graphic also determines<br />
the result. For more information<br />
on scaling, resizing, and cropping,<br />
see “Working with Graphics and<br />
Frames” on page 23.<br />
Ruler <strong>Guide</strong>s Are Objects<br />
To create a ruler guide, click the<br />
horizontal or vertical ruler, and drag<br />
the pointer on<strong>to</strong> a page or the pasteboard.<br />
If you release the pointer over<br />
a page, the guideline extends across<br />
the page. If you release the pointer<br />
over the pasteboard, the guideline<br />
spans the page and pasteboard. You<br />
can also double-click a ruler <strong>to</strong> create<br />
a guideline where you click. (Hold<br />
down the Shift key while dragging or<br />
double-clicking <strong>to</strong> add the guide at<br />
the nearest ruler tick mark.)<br />
Ruler guides behave much like<br />
objects you create with the drawing<br />
<strong>to</strong>ols. You can select a ruler guide by<br />
clicking it with the Selection, Direct<br />
Selection, or Position <strong>to</strong>ol, and you<br />
can select multiple guides by Shiftclicking<br />
or by clicking and dragging<br />
over two or more guides.<br />
You can reposition a selected guide<br />
by dragging it, using the arrow keys<br />
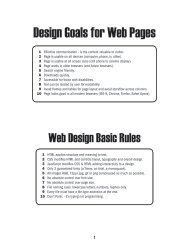
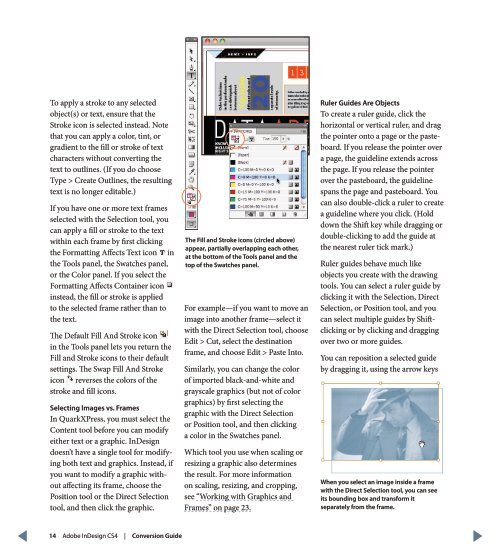
When you select an image inside a frame<br />
with the Direct Selection <strong>to</strong>ol, you can see<br />
its bounding box and transform it<br />
separately from the frame.<br />
14 <strong>Adobe</strong> <strong>InDesign</strong> <strong>CS4</strong> | <strong>Conversion</strong> <strong>Guide</strong>